
@kabib0831you need to charge it for one time over the life of the camera, once you connect the AC source you would never have to charge the battery it will work flawlessly, just keep the battery in the camera and charge it before installing it first time
1 Like
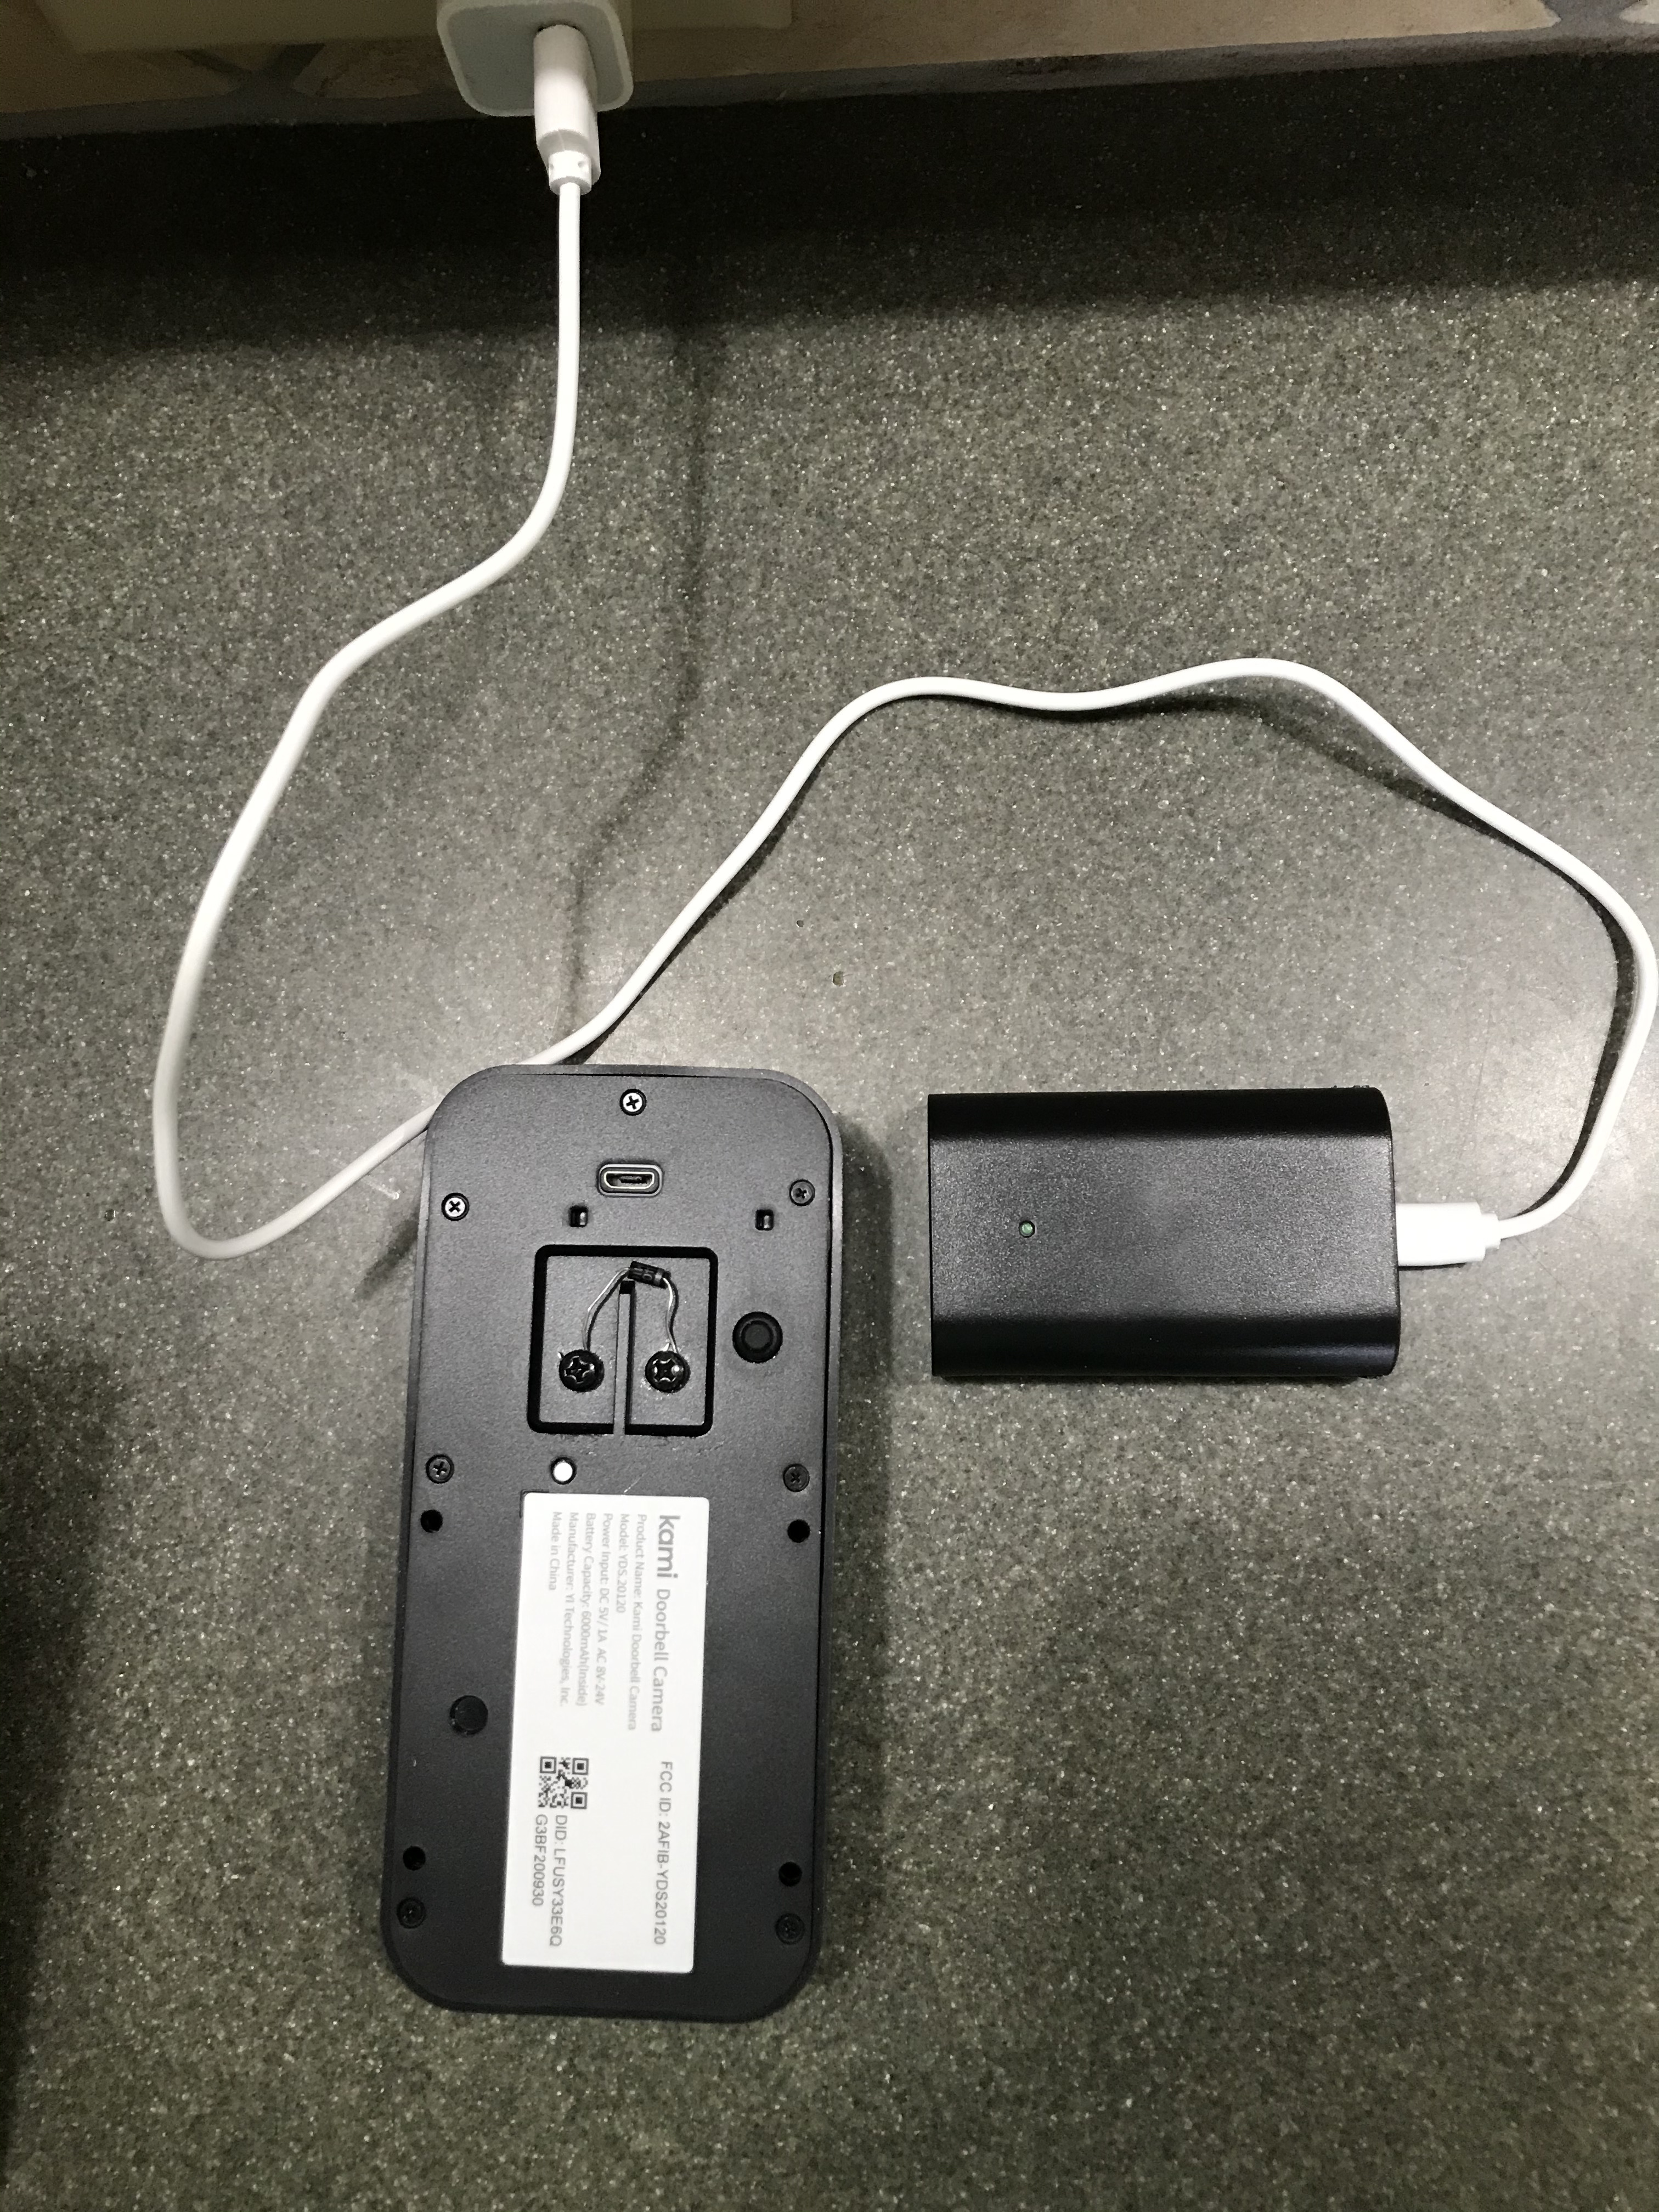
@bthoma thanks for sharing this is important to charge from bottom, thre USB port on back is testing mode in manufacturing
@bthoma. we will send you a replacement chime, we have found some digital chimes on the market are not working with Kami doorbell (its a common issue Ring also has an approved list of chimes, not every chime works with Doorbell) please contact support with the. electrical voltage at the output of your transformer or simply the input to doorbell we will send you free of cost a replacement chime support@yitechnology.com and please give my reference
@cramblda @bthoma @IndyDog @temple5150 @yamin
Our Kami Video Doorbell is compatible with most wired digital chime doorbell systems. With all the variations in wiring and voltages across the US, we can’t guarantee compatibility with every system. We have heard some feedback from a small number of digital chime users that they are having an issue with the chime continuously sounding. We are aware of this issue and our Engineers are hard at work fixing this issue as we speak.
We should have this fixed shortly. Thank you for your patience.
how far is the doorbell from Wifi router this is a common issue where you need an extender for doorbells to work
@Steven_Kami many of us have specified that we have mechanical chimes, not digital. (There is at least one user with a digital chime).
.
What is the situation in regards to mechanical chimes? I received a separate email from YI support saying “there is no known issues with the doorbell” and I should just return the Doorbell to Amazon.
.
Any updated information you could provide specific to Mechanical Chimes would be appreciated.
.
David
1 Like
Hey @cramblda Thanks for the feedback. Let me send you a direct message to grab some more information from you and we can get this figured out.
I appreciate your patience.
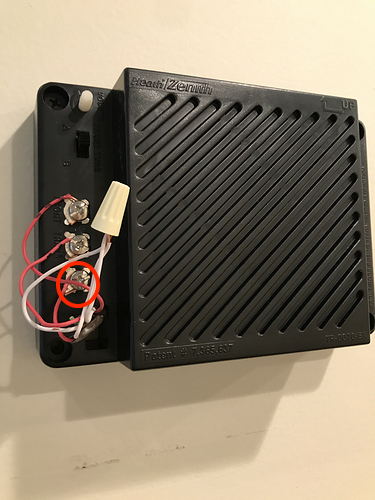
hello @bthoma Thanks for the photos! Super helpful. After a team reviewed, they noticed that you had wiring to the “rear”. Have you tried disconnecting the rear option? You only are required to wire the top 2, front & trans. See your image below for reference:
Hey @kamidoorbellnoob Welcome to community! Great name by the way. Thanks for joining
You’re almost there! You need to charge the batteries for the first charge through the bottom of the device. It’ll take longer but give you the necessary charge.
The USB port in the back has a much lower current rate.
So, give that bad boy a full charge through the bottom if the device and you’ll be good to go!
Thank you so much. I did charge the battery completely the first time and connected the charger on the back but based on the response from @Steven_Kami it appears that the battery drain faster than that is being charged. I now recall not receiving a USB AC adapter but didn’t bother because I have many from previous cell phones, I only received the USB cable. The USB AC I’m using maybe not be of the appropriate voltage for this doorbell. Honestly, I really like the camera but I’m finding too many issues. I’ll keep trying every so I can keep it.
1 Like
@kabib0831please charge from bottom of the battery not the back of the camera see picture, the USB connector on back of camera is used for testing in manufacturing not for charing
1 Like
According to @Steven_Kami is also to keep the battery (previously charged from the battery port) with enough power. I can’t see myself my pulling that battery out every time it needs to be charged. Thanks again for your response.
1 Like
@kabib0831if you have charged the battery in full prior to installation using the bottom port and are hard wiring the doorbell it won’t be a problem.
And, the battery has excellent battery life, even if you decide to use simply battery power. You’ll be incredibly impressed with the battery life!
Thanks for your feedback on the forum!
What is the power source? Are you using our provided USB cable?
How far away from the router is your doorbell?
Are you connecting to 2.4ghz it 5ghz?
How many walls are in between the router and doorbell? And, what material is the outer wall made of?
Thanks for you assistance. These will really help us trouble shoot. We will follow-up with you in the morning on this.
Thanks, yeah using the microusb cable. It charges fine when i actually take the battery out and charge from the bottom.
Once that is done, i reassemble it but onto the door and everything works fine. Router is right by the door/doorbell.
2.4 and wooden door.
It’s not a setup issue because everything works as intended. Until I try to plug in the microusb power cable from the back. Then everything stops working.
Once I unplug it, it works fine again.
So how can I get a constant power source via microusb without having to remove the battery ever so often.
*separate note: might be worth having a little lightning symbol on the battery indicator in the app view when it is charging
Steven,
The issue with my mechanical doorbell is also still not resolved. It works when unwired, however I have no mechanical chime. When wired, the unit does not stay connected to WiFi.
I’m willing to change to an electronic chime. Is there a list of approved, tested electronic chimes? Thank you.
Let me look into a list of approved mechanical chimes and get back to you later today.
Thanks for providing this. Super helpful for our team. I will have more info in a few hours. Thanks for your patience.
Just to clarify. You only need to fully charge once using the base port. No continues charging needed as the battery will have infinite charge.