
@Steven_Kami Thanks, I think this video helped me resolve the issue. I will confirm after 24 hours of oberservation.
.
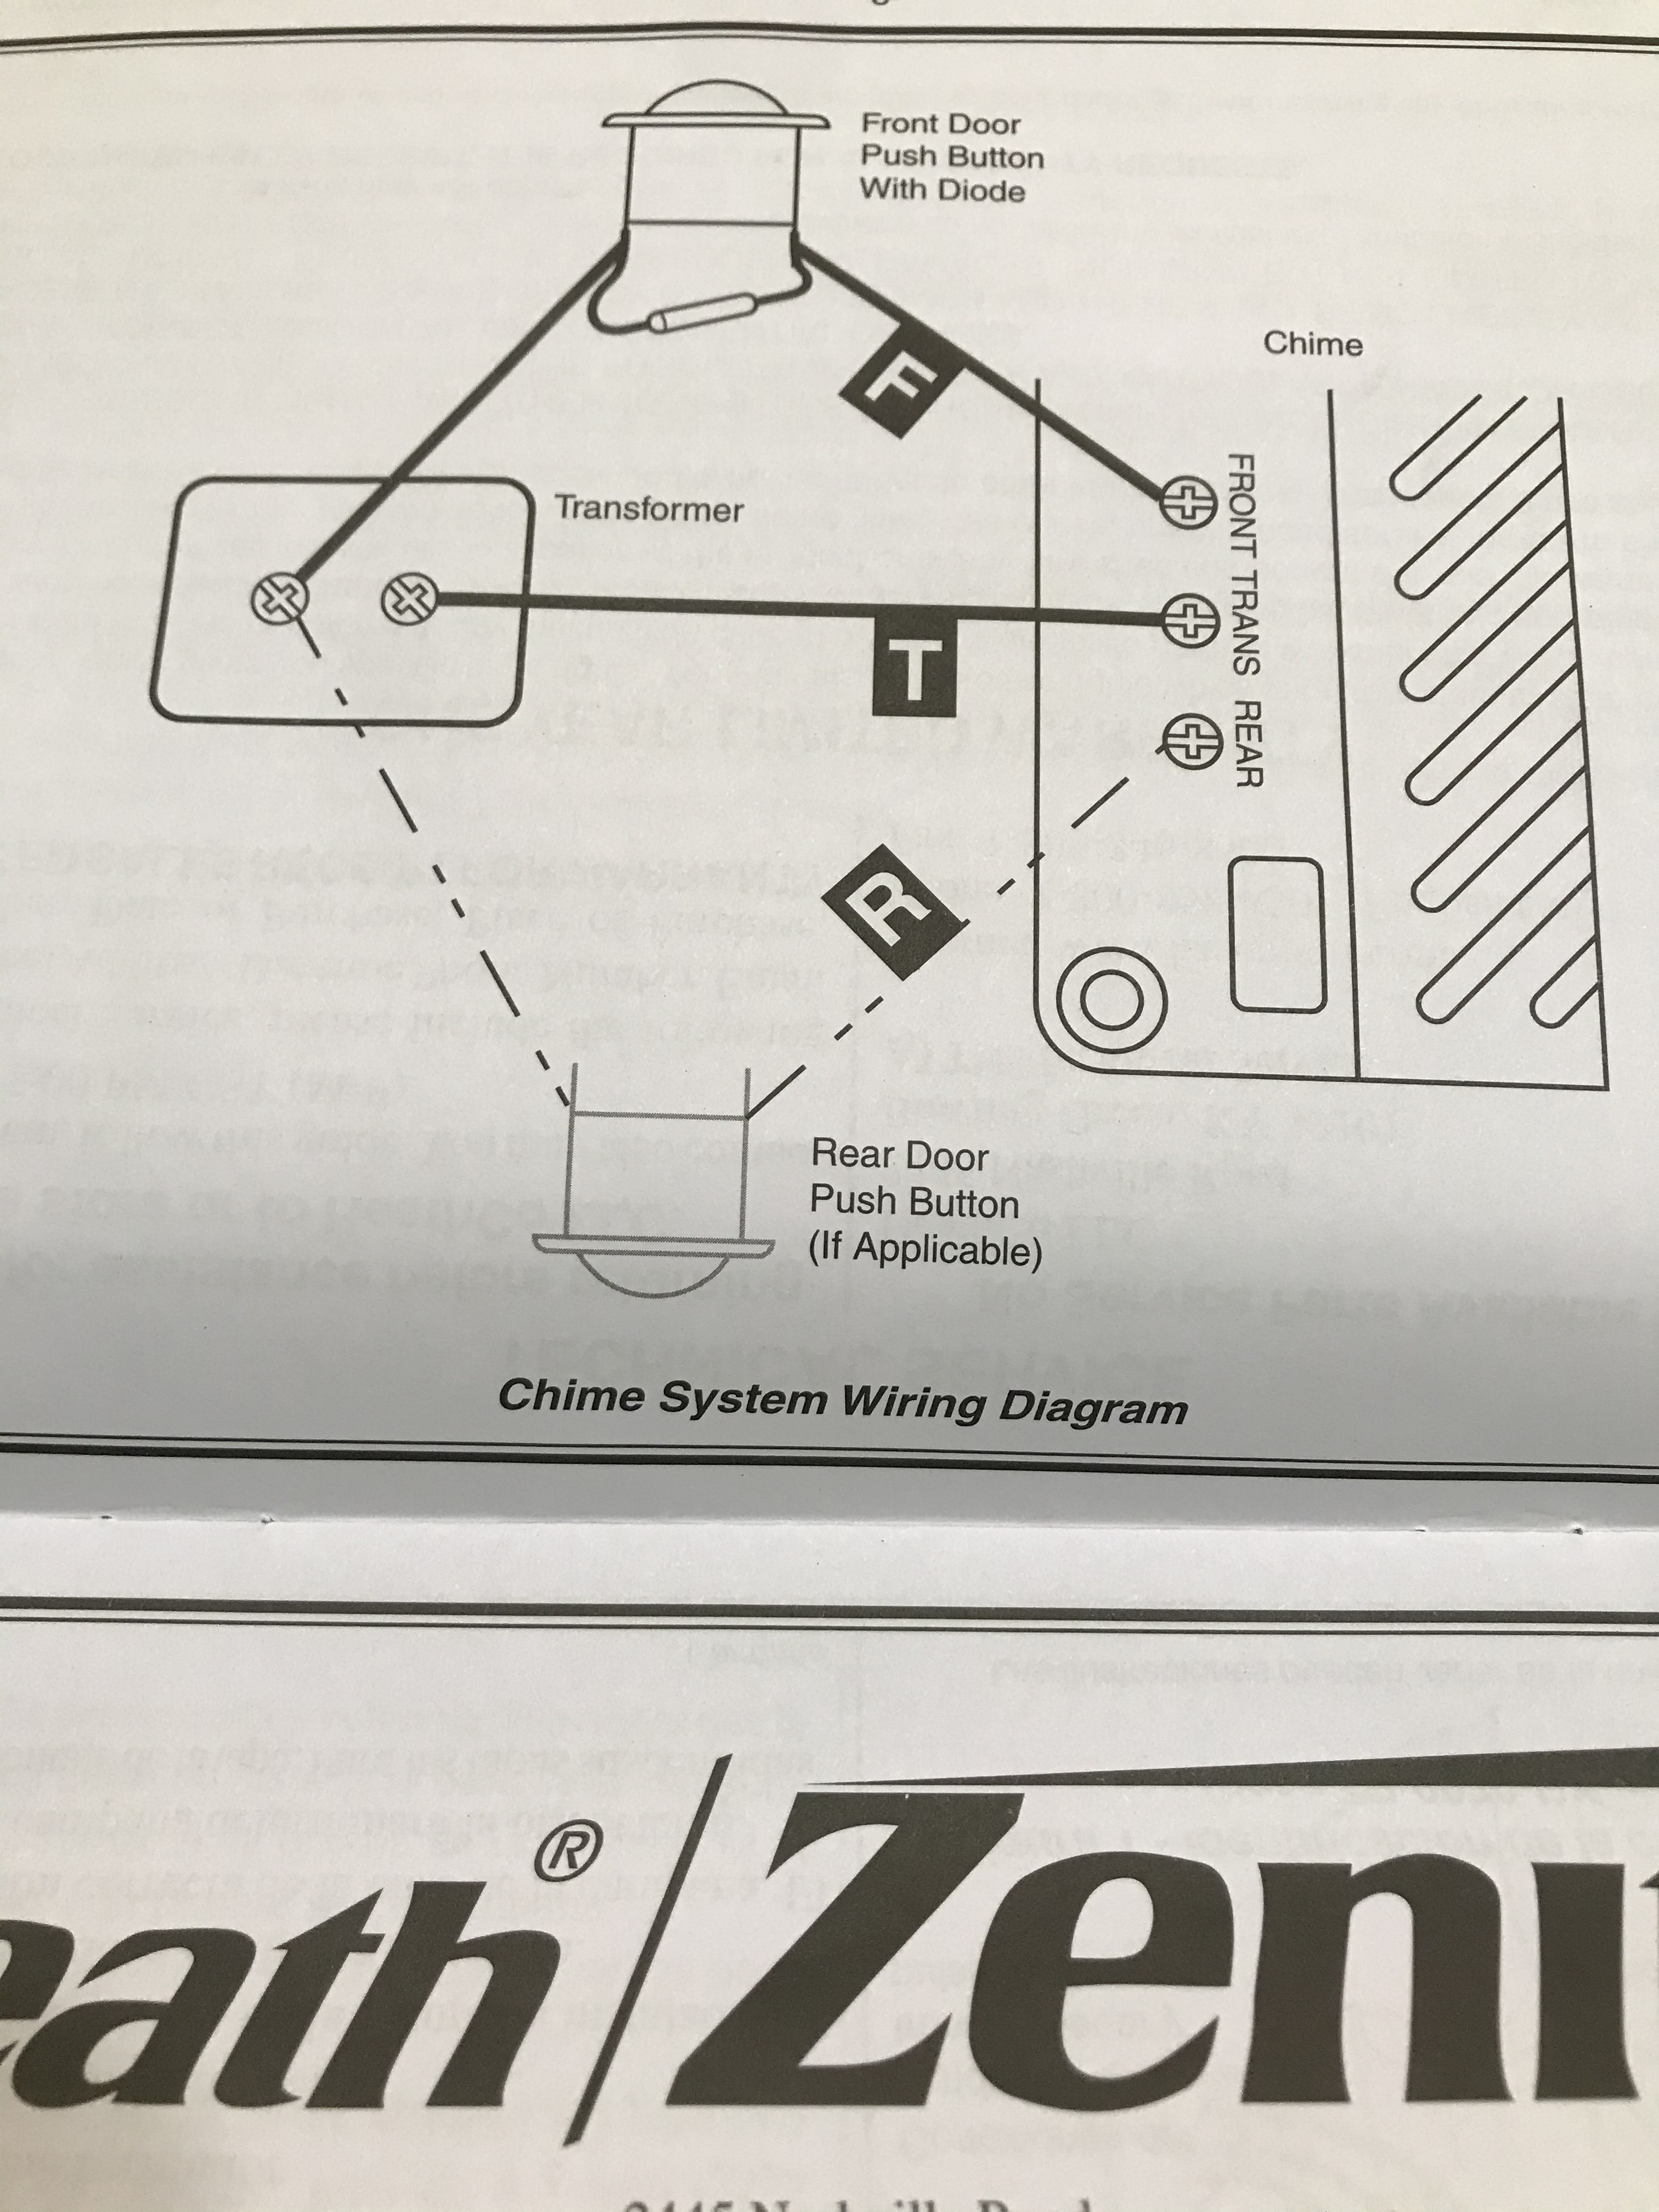
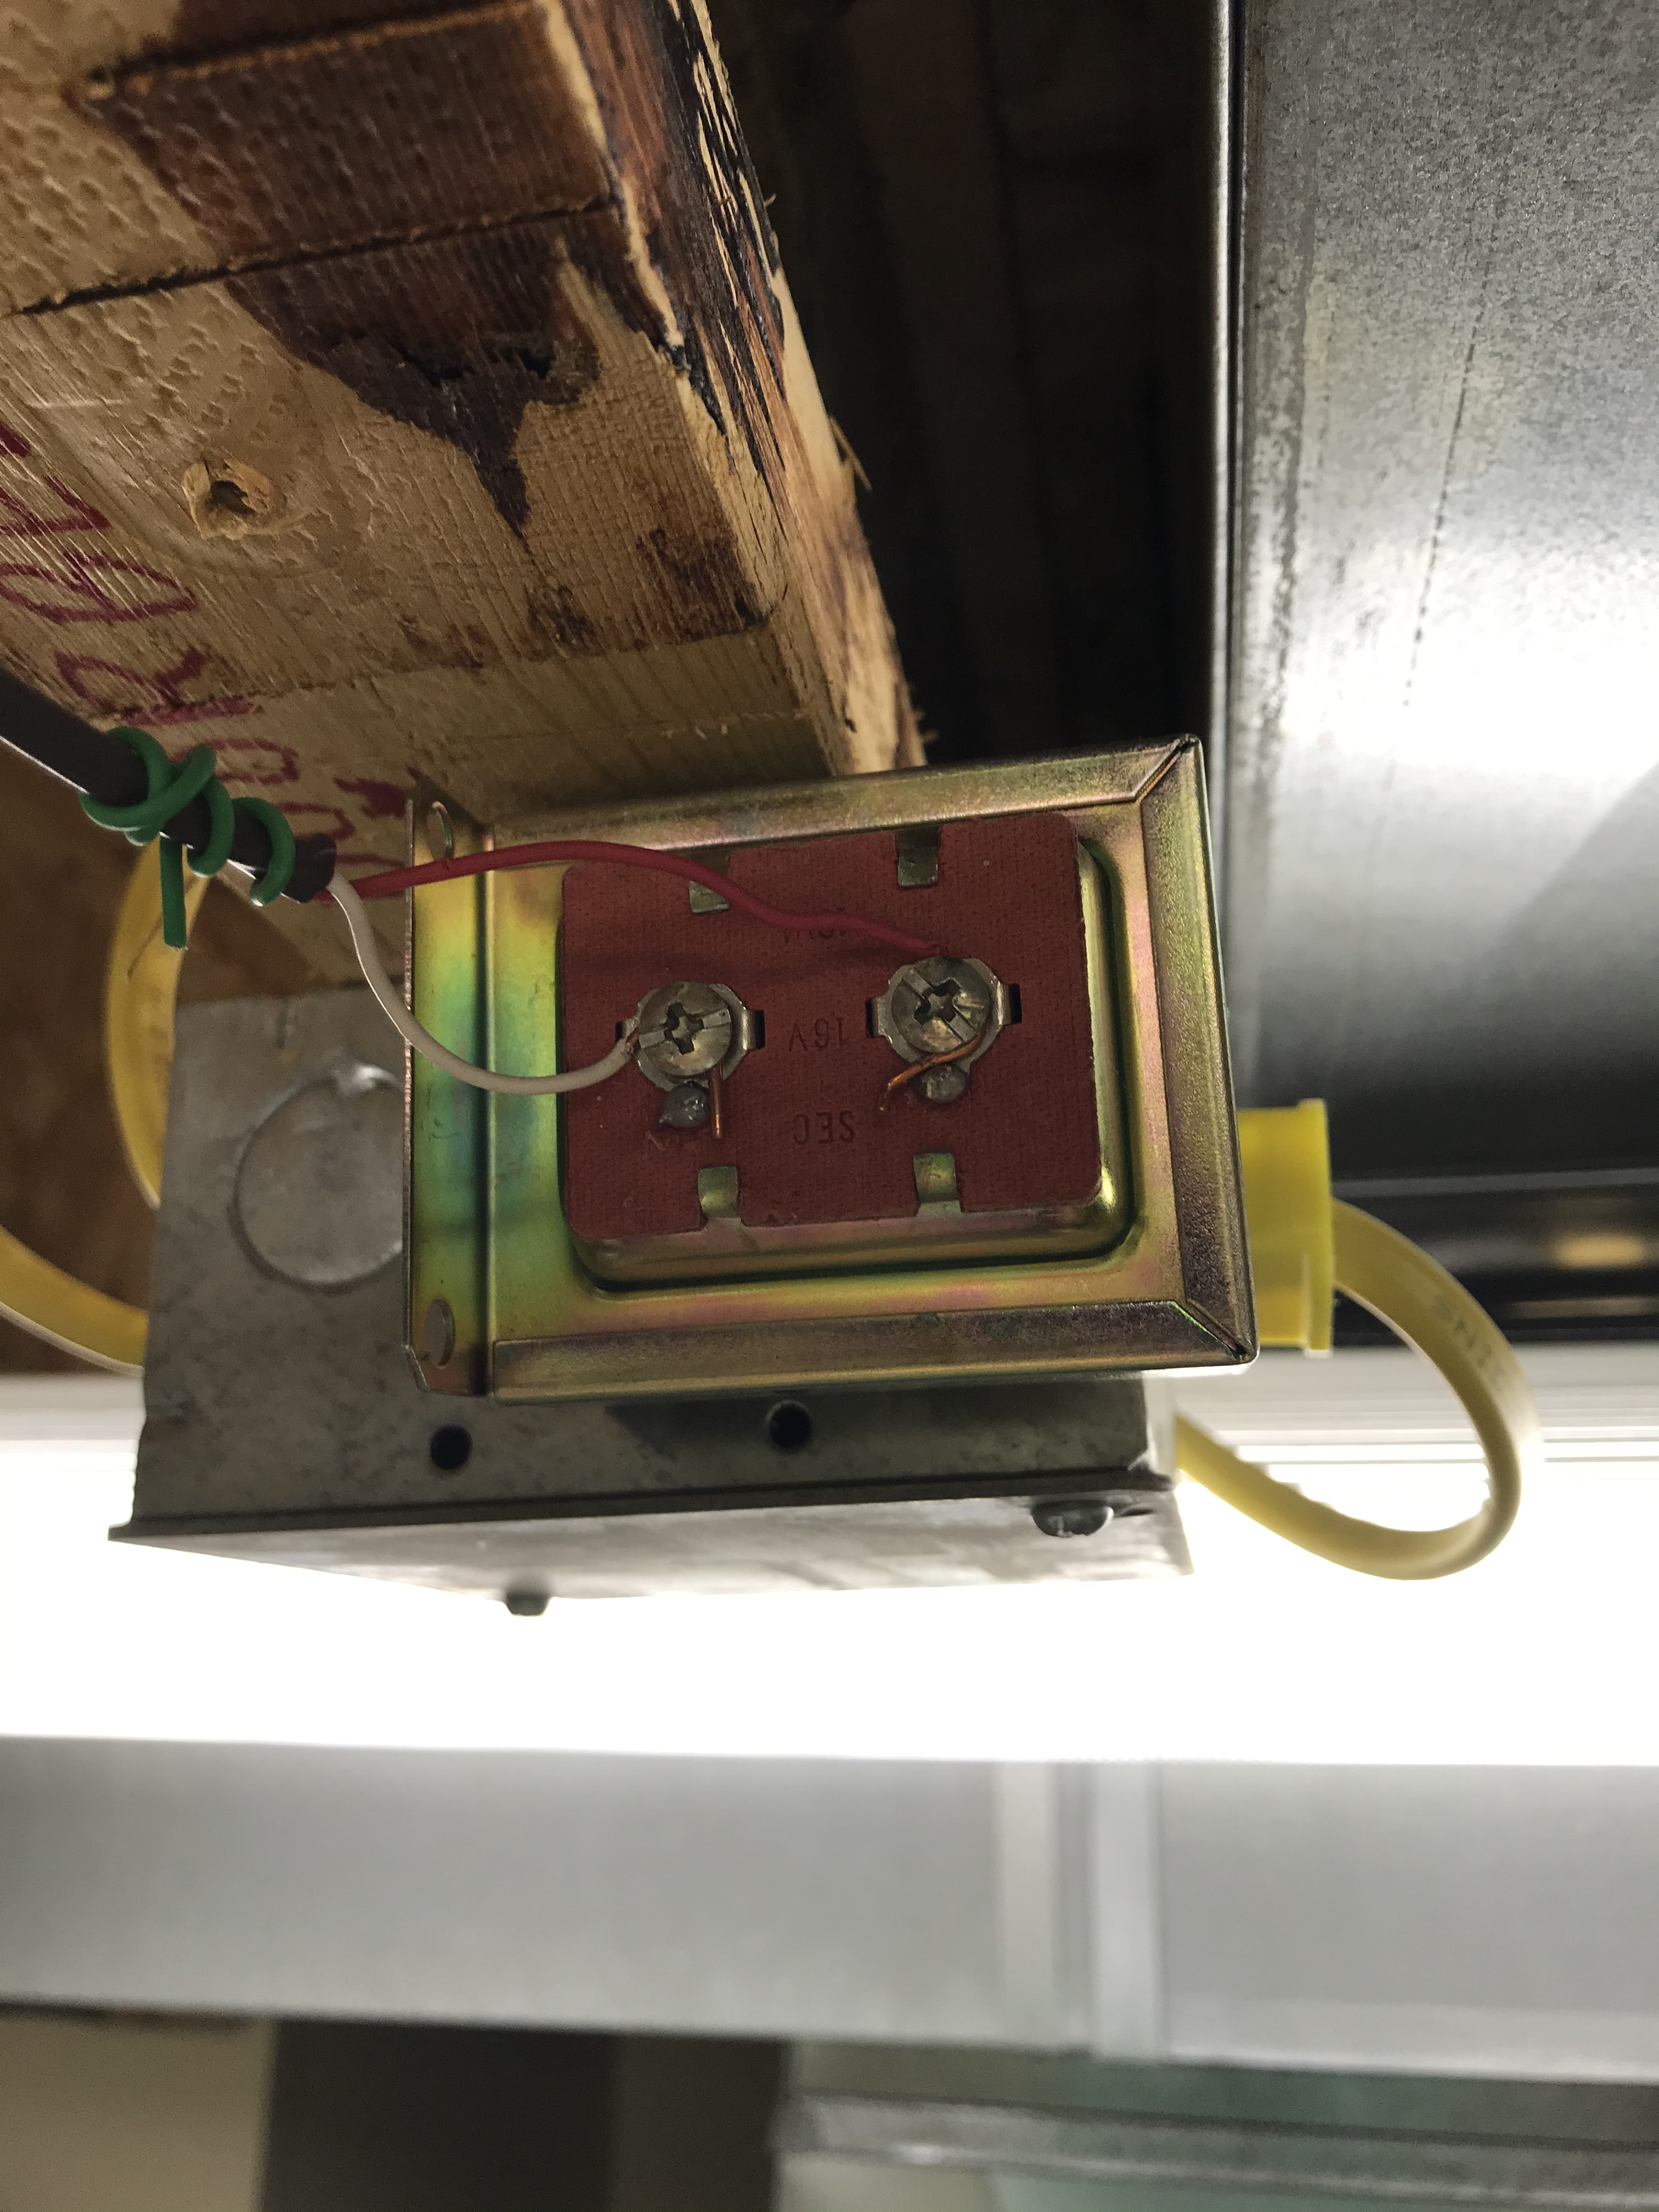
I had installed the Kami Chime Connector to the back of my doorbell transformer terminals as they were the most accessible. However, in the video they showed the Kami Chime Connector being installed to the terminals directly on the mechanical chime.
.
I removed the cover on my doorbell mechanical chime and then moved the Kami Chime Connector from the back of the transformer terminals over to terminals on the mechanical chime.
.
Now my doorbell is ringing properly and the camera is not going offline anymore.
.
David
1 Like
@cramblda AWESOME! Please keep us posted after your 24hr observation. I am so glad the installation video helped.
Thanks for the update, @IndyDog. Let me bring this to the team and get back to you with some more information. As soon as I know more, I will let you know.
@indydog Questions from our technical team…
How far away from the router is your doorbell?
How many walls are between your doorbell and wifi router?
What are those walls made of?
Thanks for your patience & understanding. We will get this resolved.
Thank you cramblda,
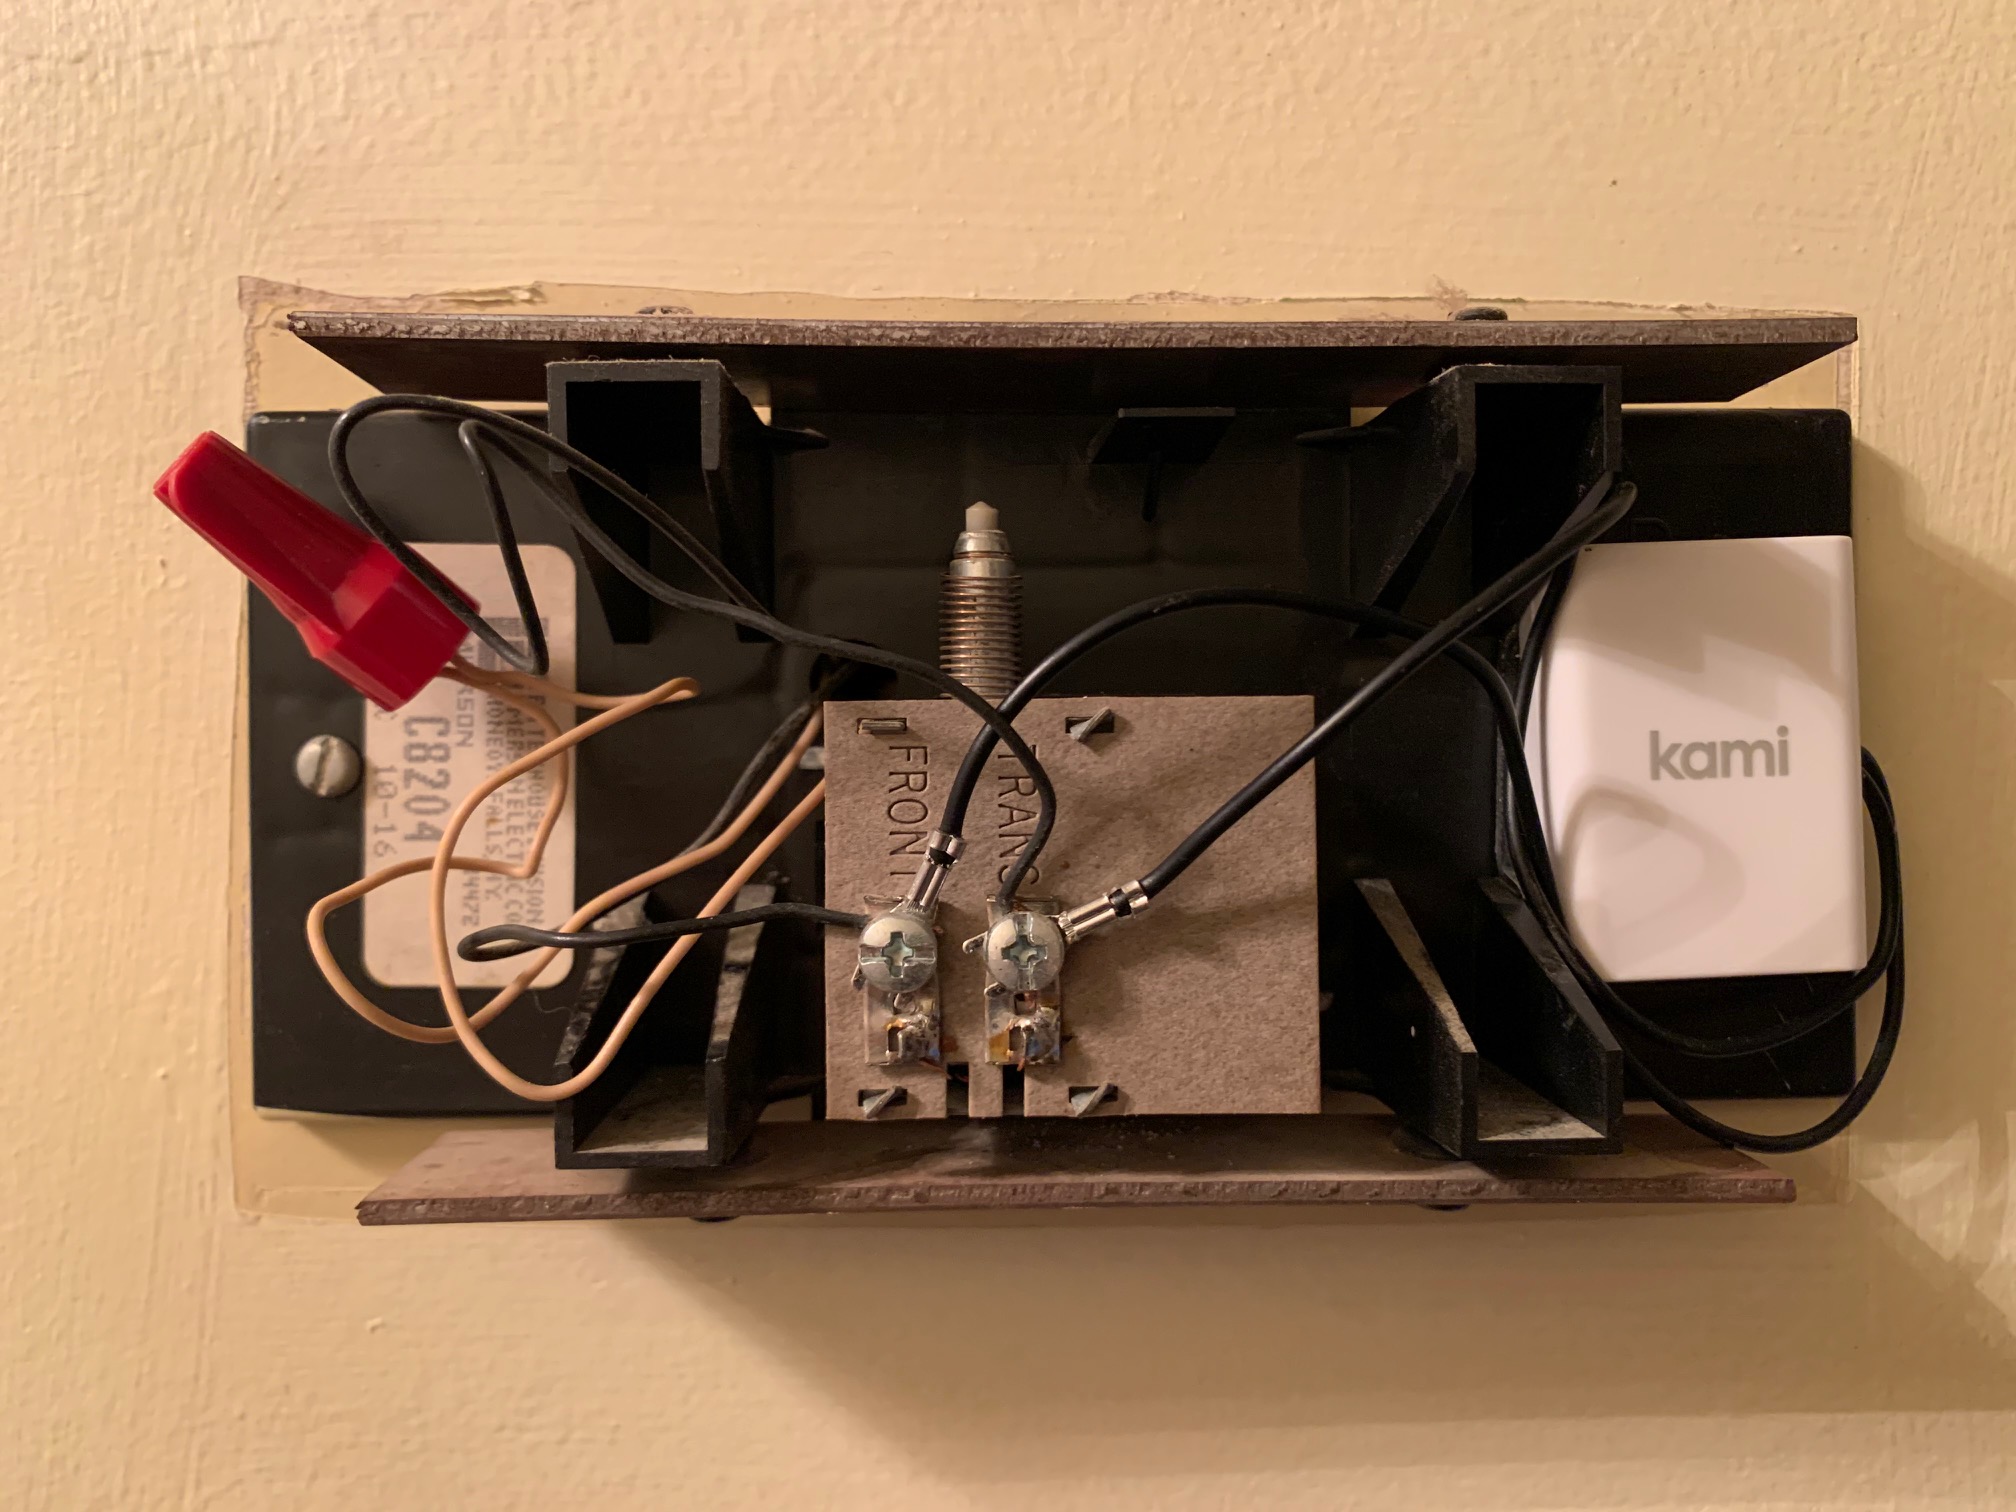
Is there any chance you could post a picture? I have my chime connector also directly connected to the “Front” and “Trans” posts on my chime, and I’d like to make sure it’s the right way. My setup is almost identical to the video.
Hello,
The router is about 20 feet from the doorbell, the only wall between them being the exterior wall, made of wood and glass.
For a brief time when I had connectivity, I tested the network status on my cell phone and it came back with “Excellent” There was no router packet loss or internet packet loss.
Thank you again for your responses.
1 Like
@IndyDog thanks for feedback. I will pass this along to the technical team and let you know what the say.
I wonder if @cramblda wouldn’t mind sending a photo when he has a moment. That might be beneficial for others.
Bad news @IndyDog my Kami Doorbell only worked for 10-15 minutes (I wasn’t continuously monitoring it).
.
This is exactly how it behaved the first time I installed it wired to my chime. It worked for a short time, and then began to go offline an hour or less later. It wakes up for a minute if I ring the doorbell twice (the ring turns blue) and then I can access the camera again. A few seconds to minutes later it’s back offline.
.
@Steven_Kami I can confirm that my Kami Doorbell is installed exactly as the video described. I understand your saying the issue is not widespread. However, these units just went on sale a couple of days ago and there are already 4 people on this board with a similar issue when wiring the device to the house chime. The Camera is great when it’s in battery only mode. Unfortunately it’s not that useful with out the direct power and chime working. I can wait a few more days for a solution, but will need to return through Amazon soon if no solution can be found.
.
Also, I’m reading ~19v at my doorbell chime leads.
.
David
Hey @cramblda thanks for the feedback. I apologize for the frustrations and really appreciate you help troubleshooting this.
I am going to share this information with the technical team and get back to you in the morning as soon as I know more.
I appreciate your candor and your are 100% right. The hardwire option is incredibly important for the functionality of the a “doorbell” in general. we are confident we will come to a resolution. Thank you for the patience and we appreciate the time to work his out.
And, thank you all for your patience. I will be in contact tomorrow as soon as I know more.
I thought of that, and removed the diode from my existing door bell button (I knew it was good) and tried it on the Kami Doorbell Camera. It did not solve the problem. I also tried reversing the diode but that did not help.
Thanks for the feedback @bthoma super helpful. If at all possible, can you send any pictures of just the view of your setup? Nothing else. We want to respect your privacy but it would be helpful for the team.
All - if you can send photos of just your Doorbell installation setup, please do.
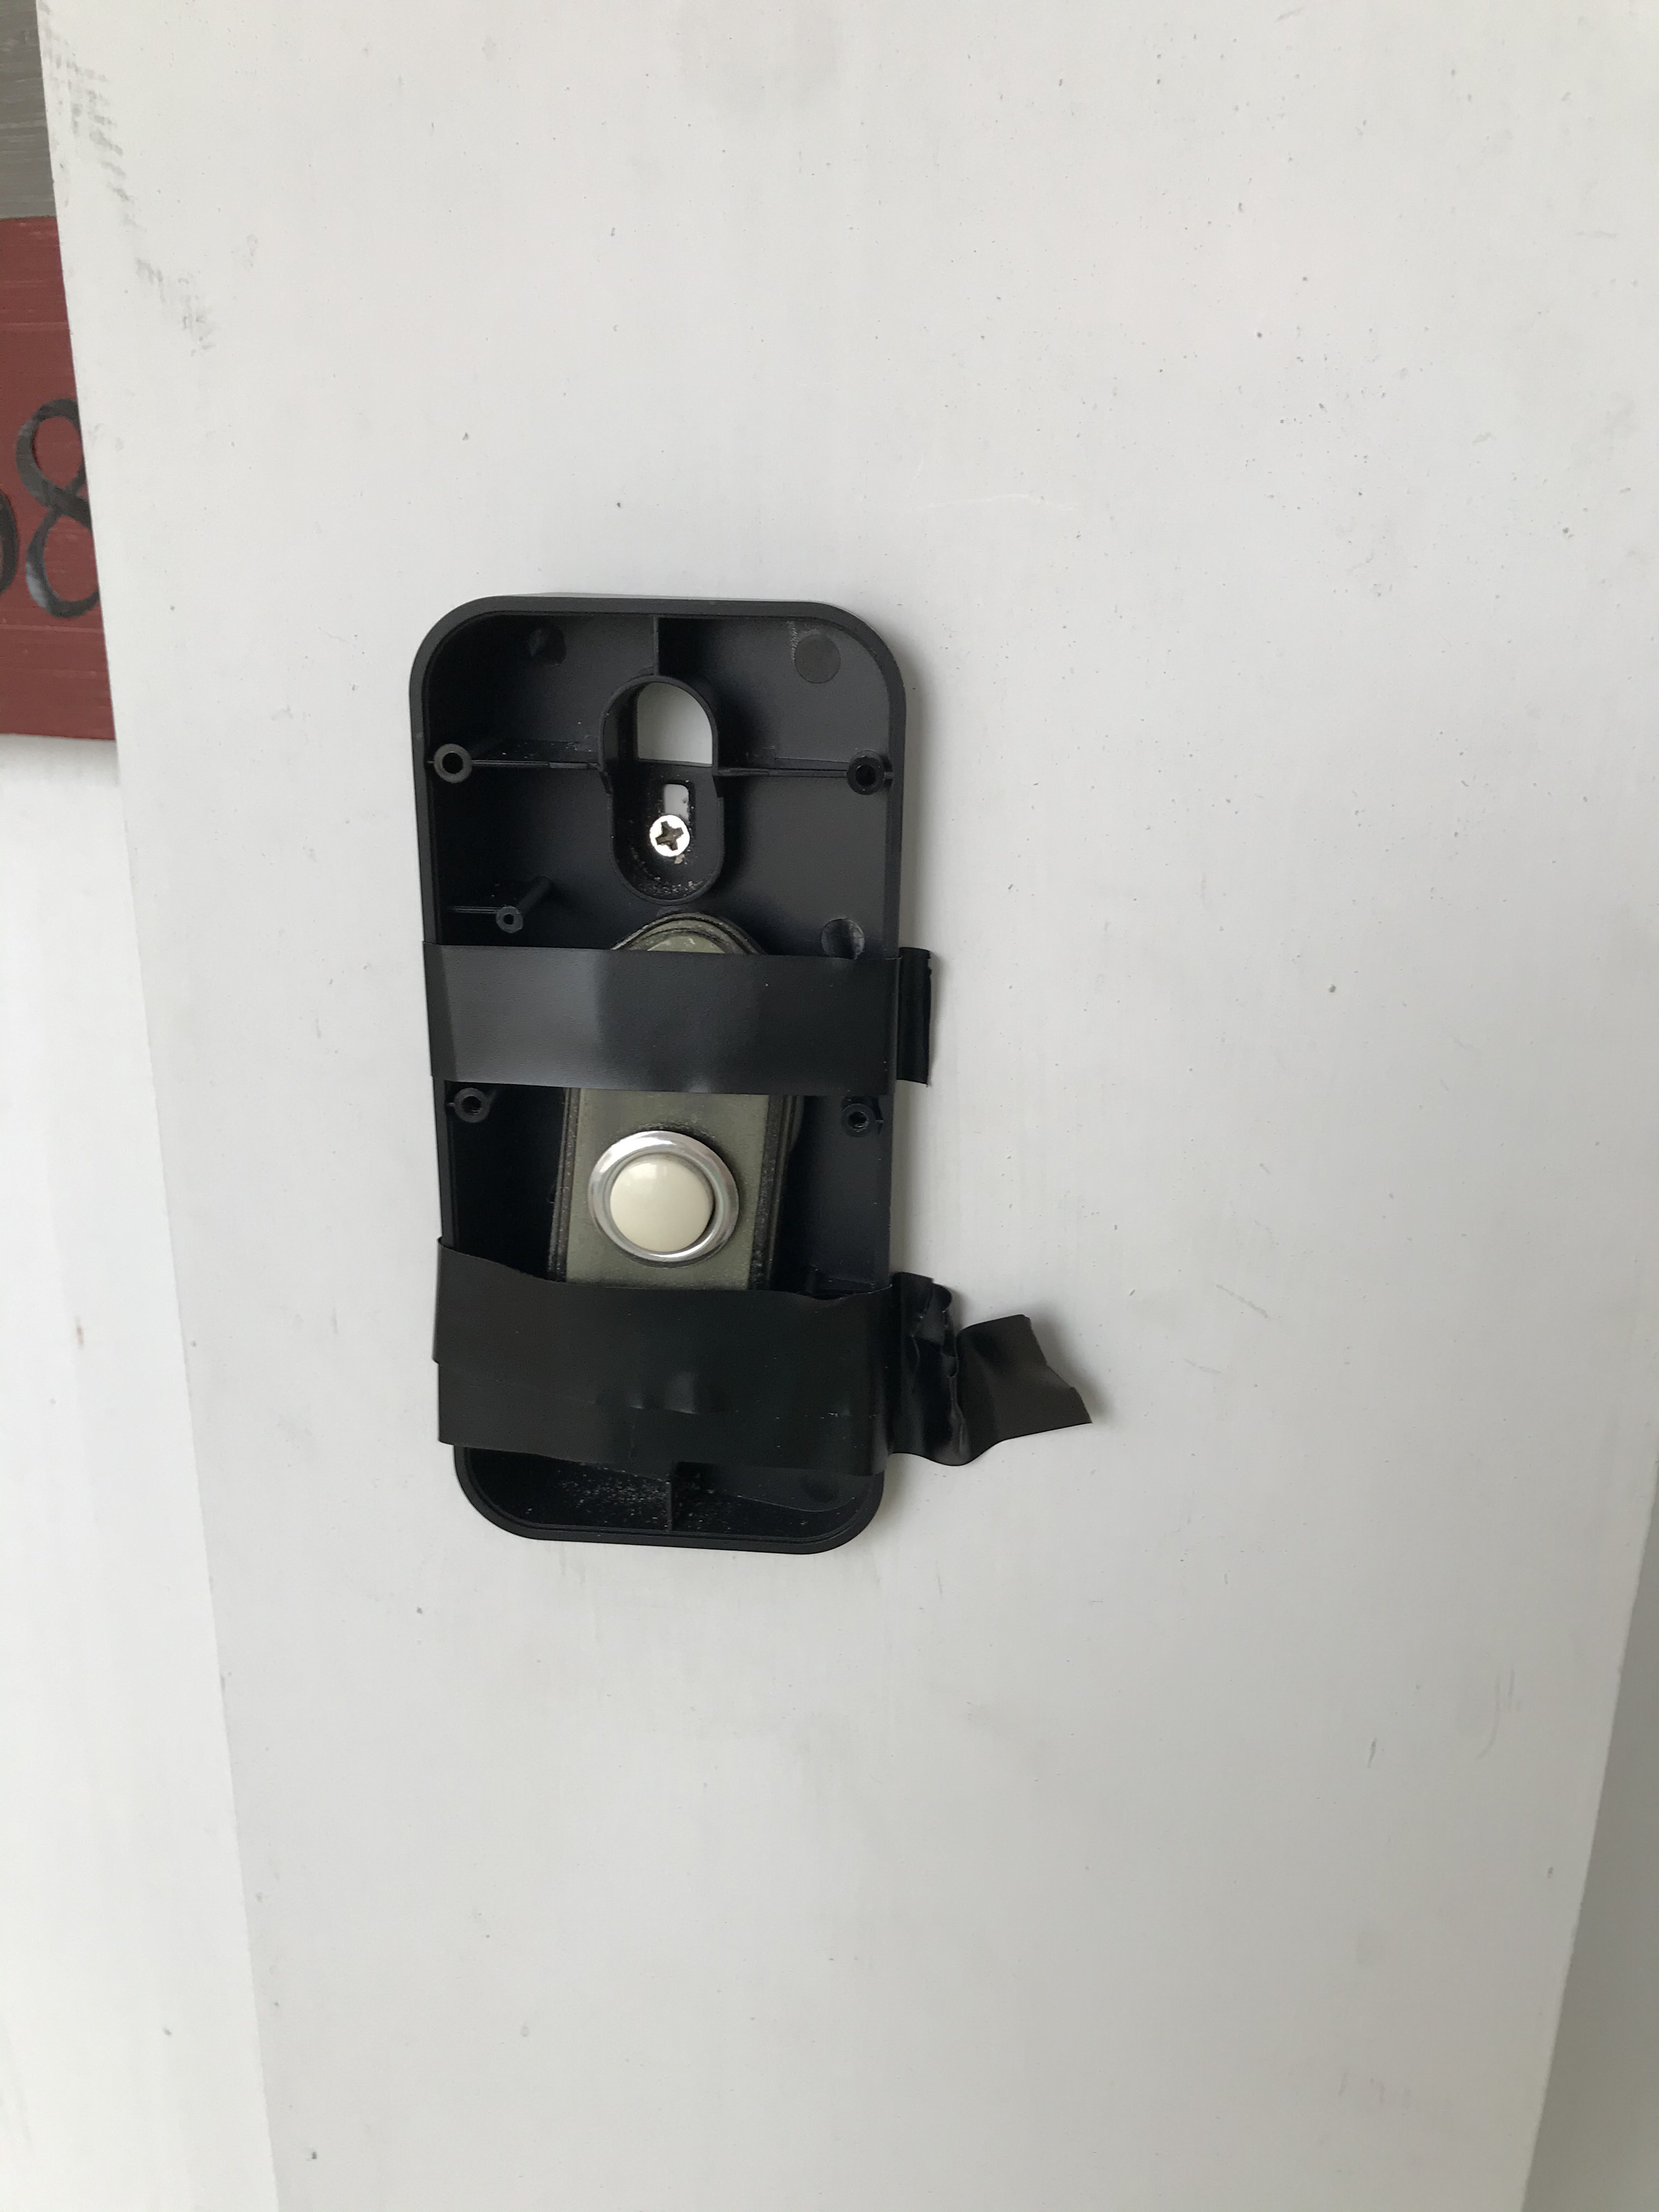
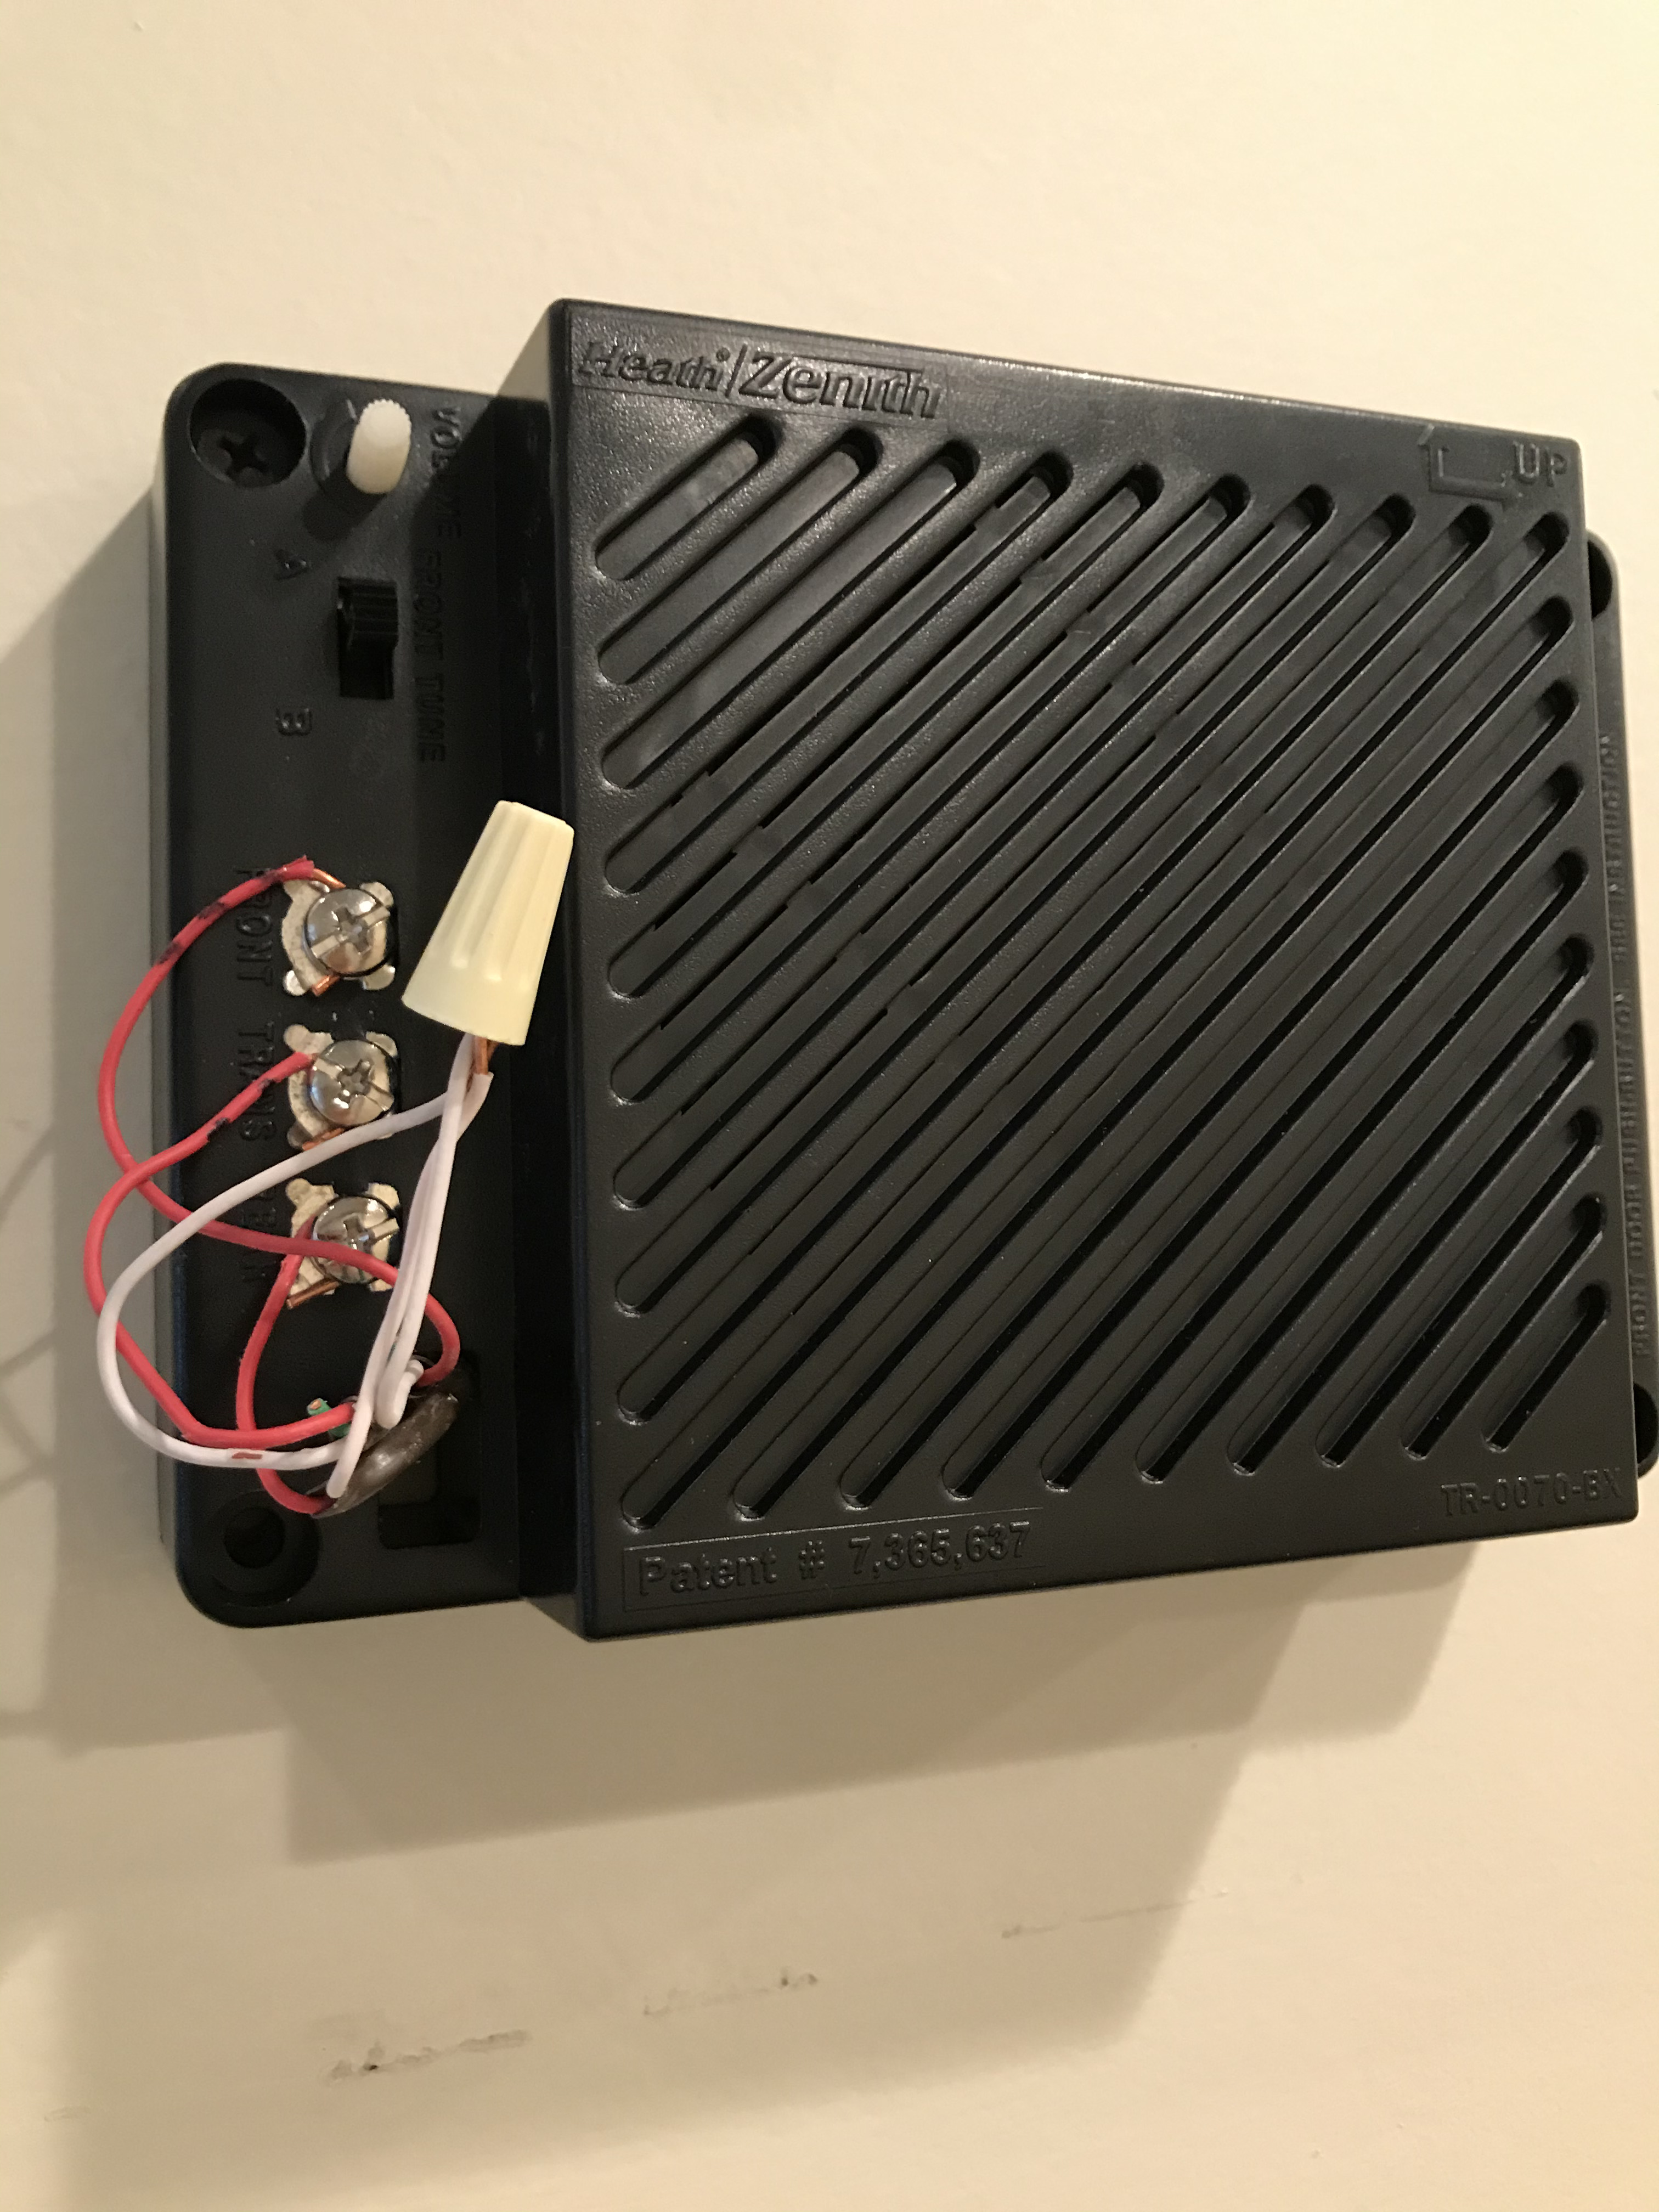
Here are photos of my Heath Zenith Electronic Door chime. The chime is located on the wall at the top of a stair way. I have a front doorbell button (with diode) and a back door bell button. All was working fine and is again now that I reattached my old front door bell button - see photos. I taped it in place temporarily - Not pretty but it works for now! Also included a video to show you it works.! - well I tried to send a video but it was not the accepted format and would not upload. One of the photos shows my old button with the diode in place.
IMG_2959|375x500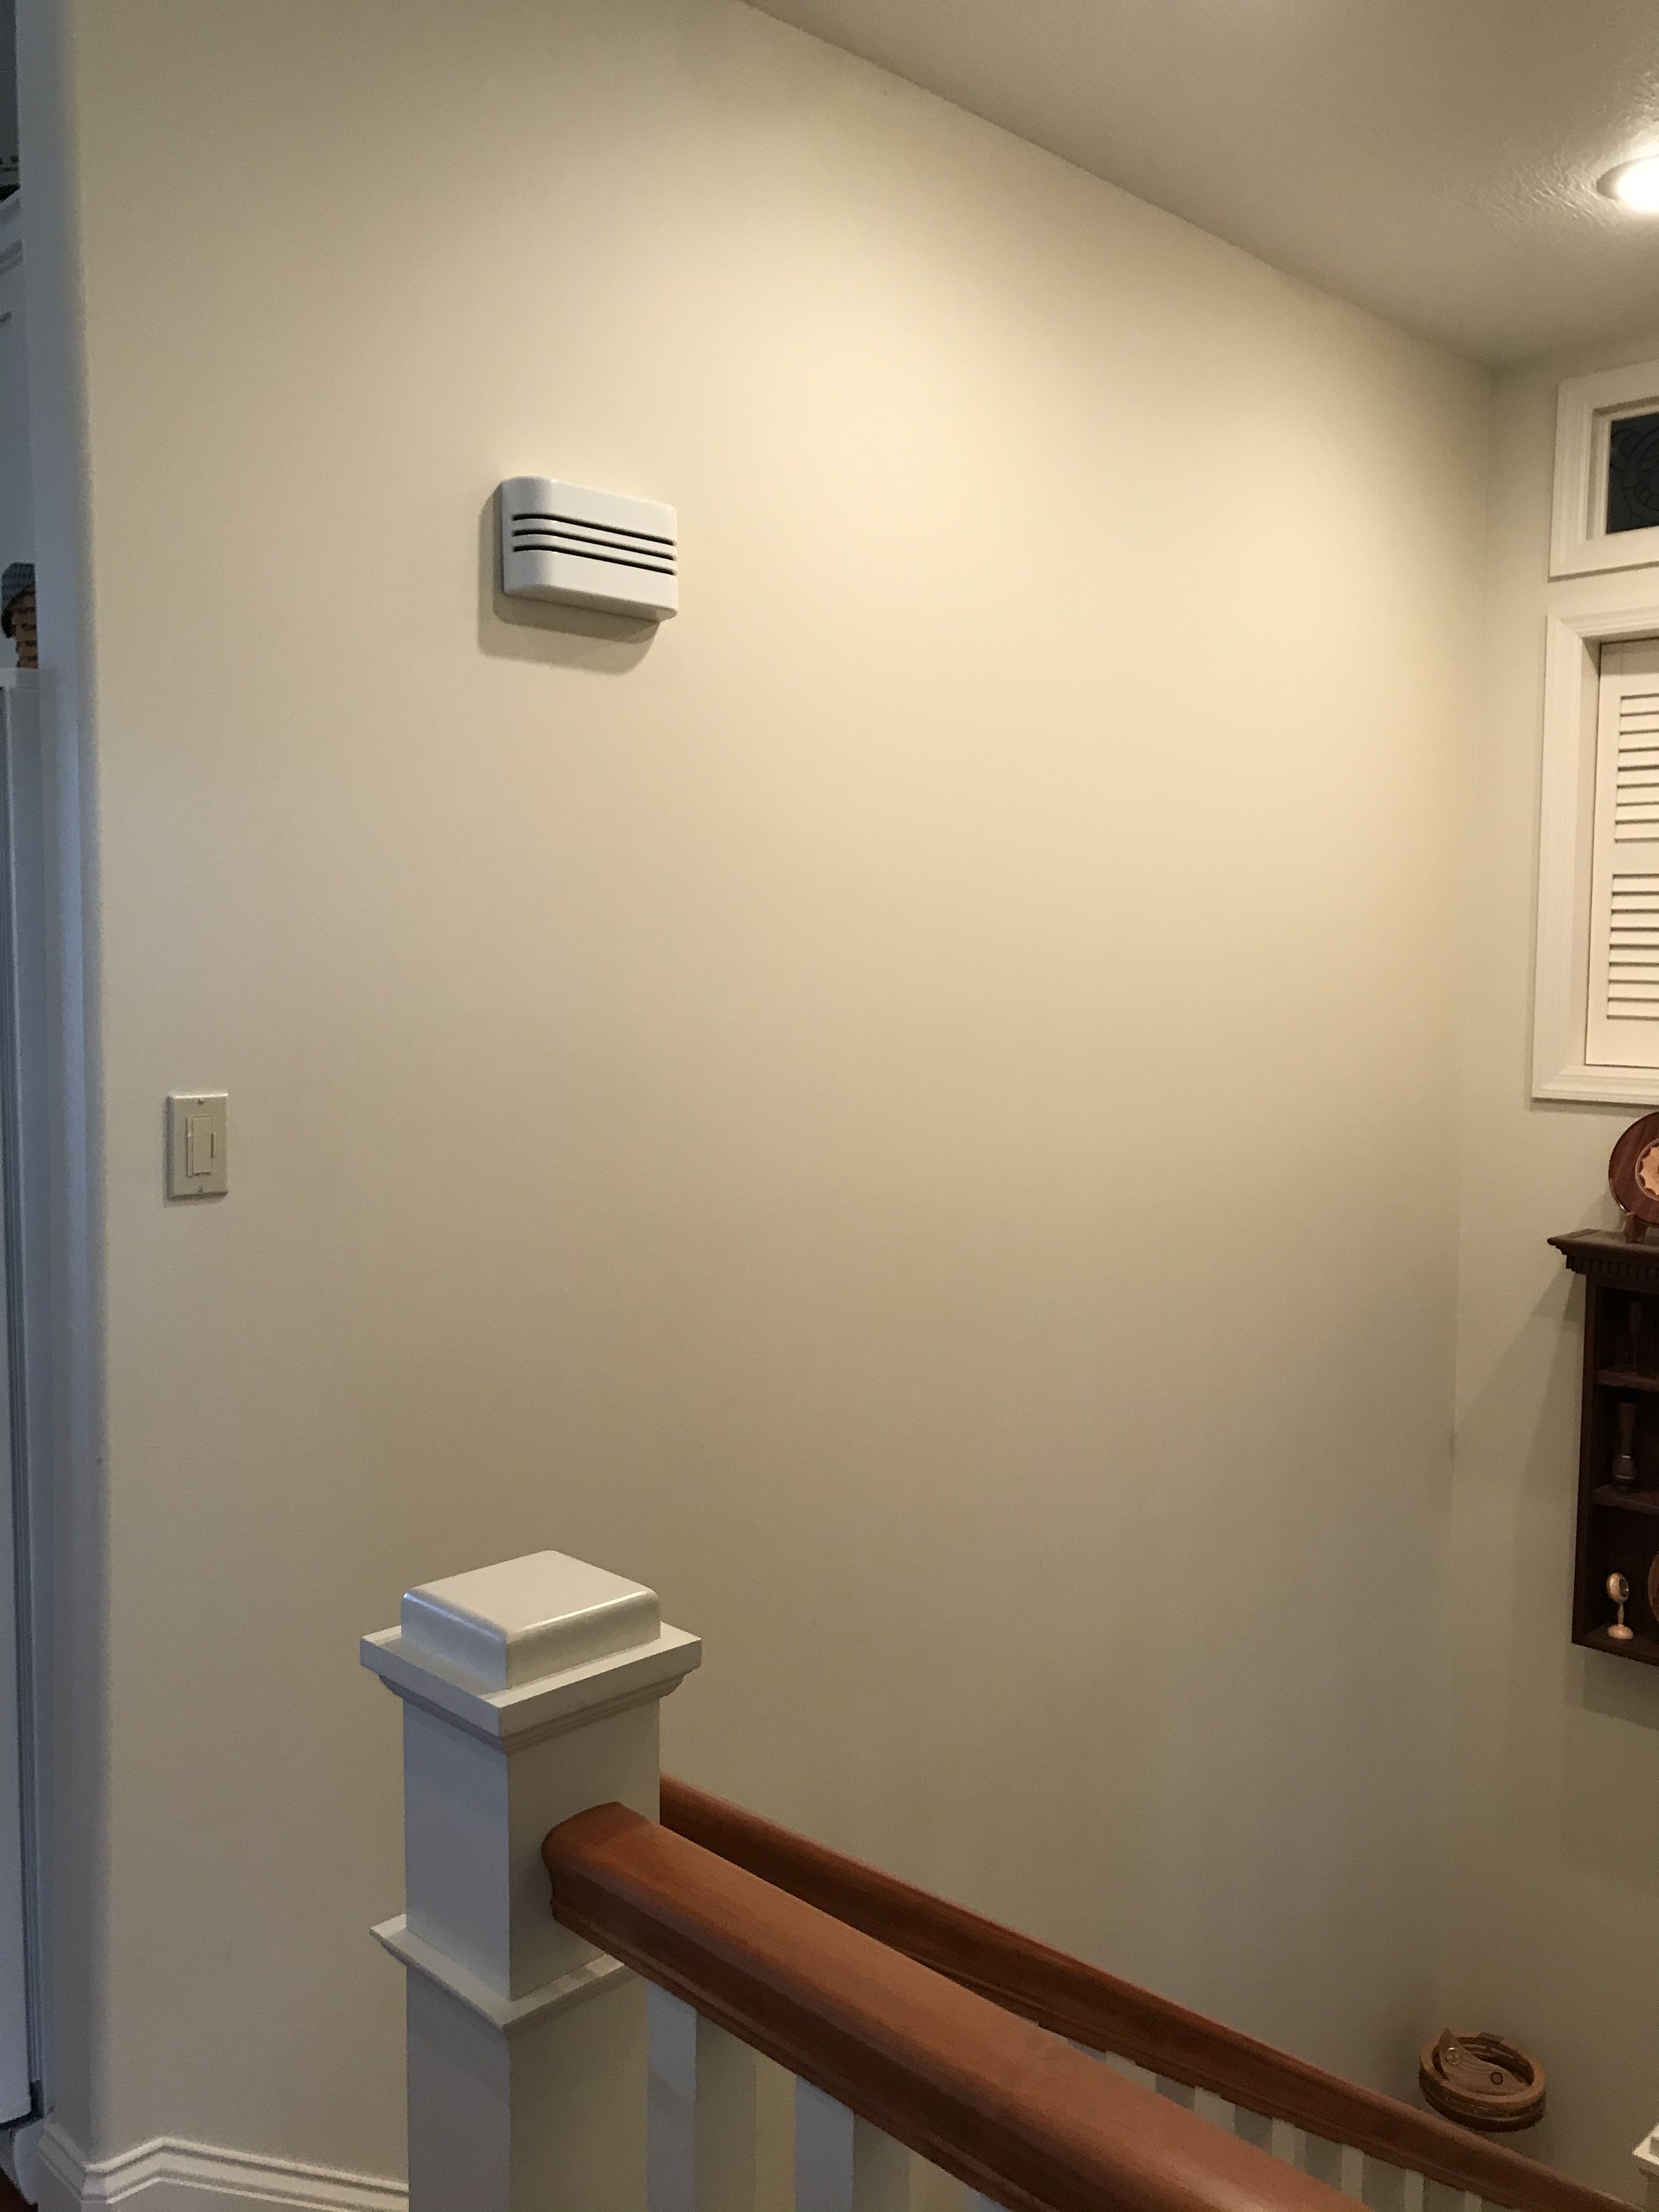

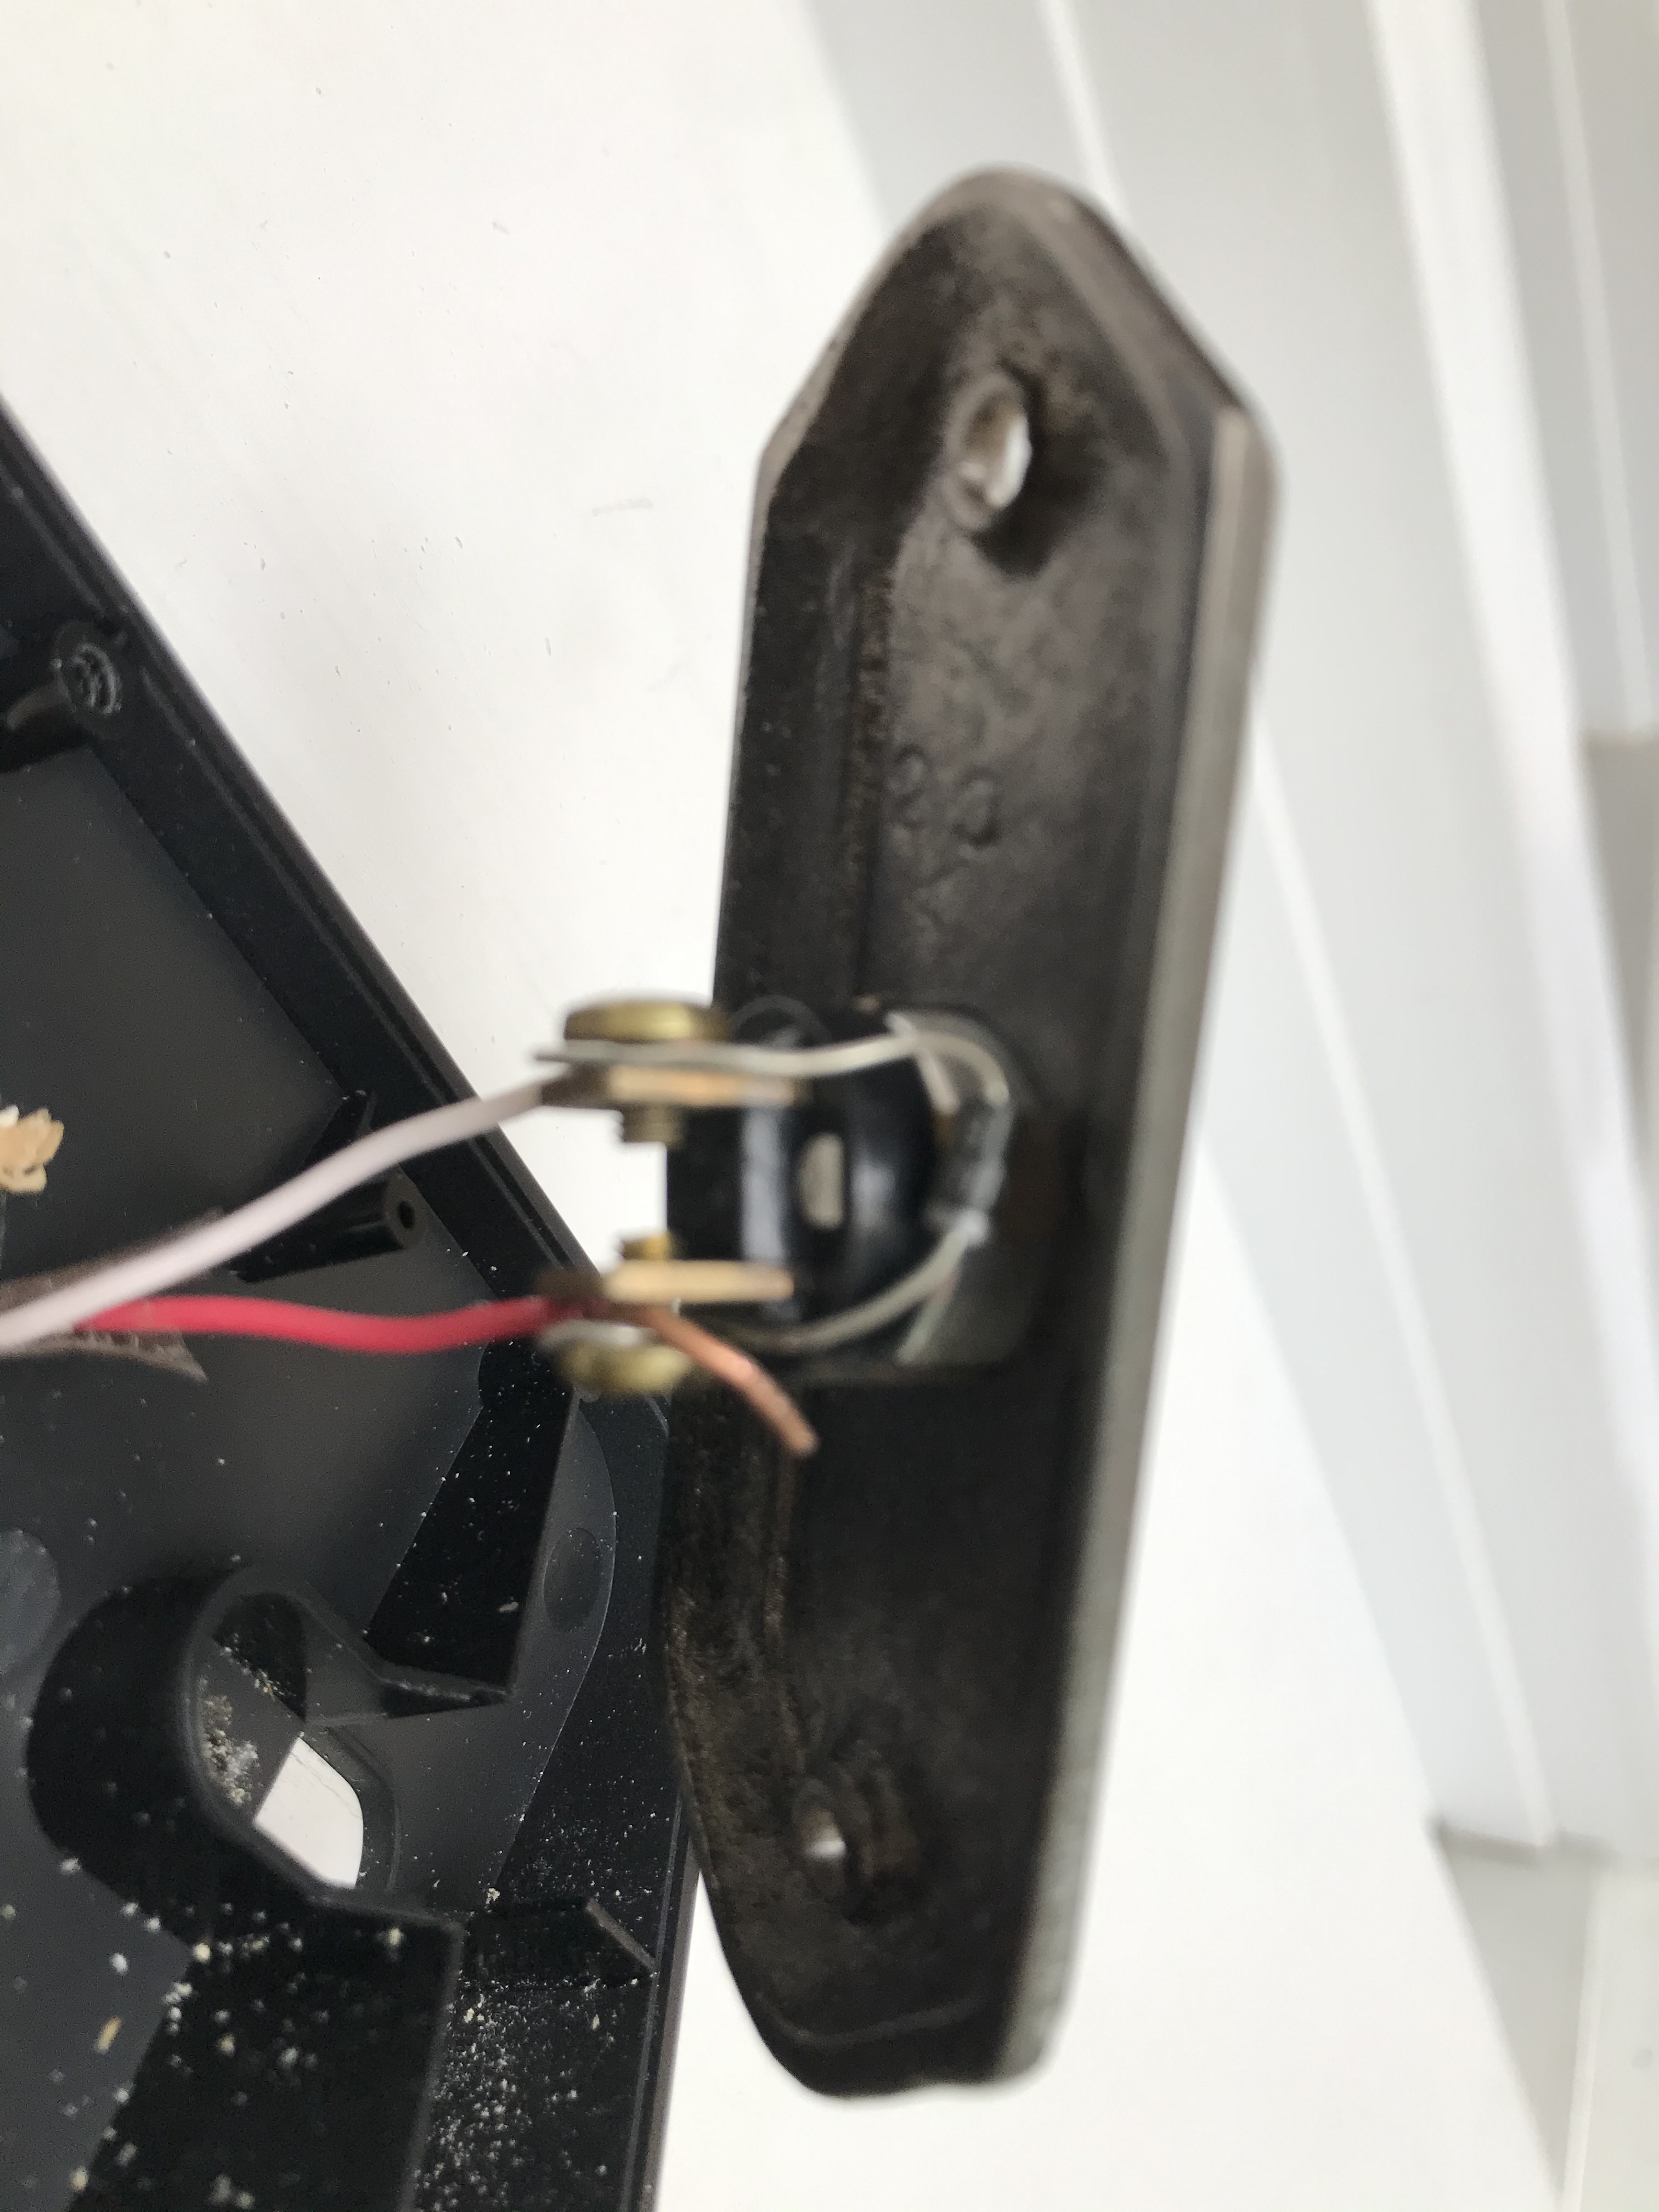
Since my electronic chime required a diode, I knew before I even started the Kami installation that I would need to use the diode. I used the diode you supplied first and when the Kami did not work I changed the diode orientation, but that did not help. I then removed the diode I had on my button and tried it with no success. I then put my diode back on my button and reconnected it and all is working again, so I know my diode is good.
Hey @bthoma Thank you for providing the screenshots. That is incredibly helpful for our team to help diagnose.
Please know that we are working on this problem and will continue to update you daily until we have a full resolution.
Thank you for your support & assistance.
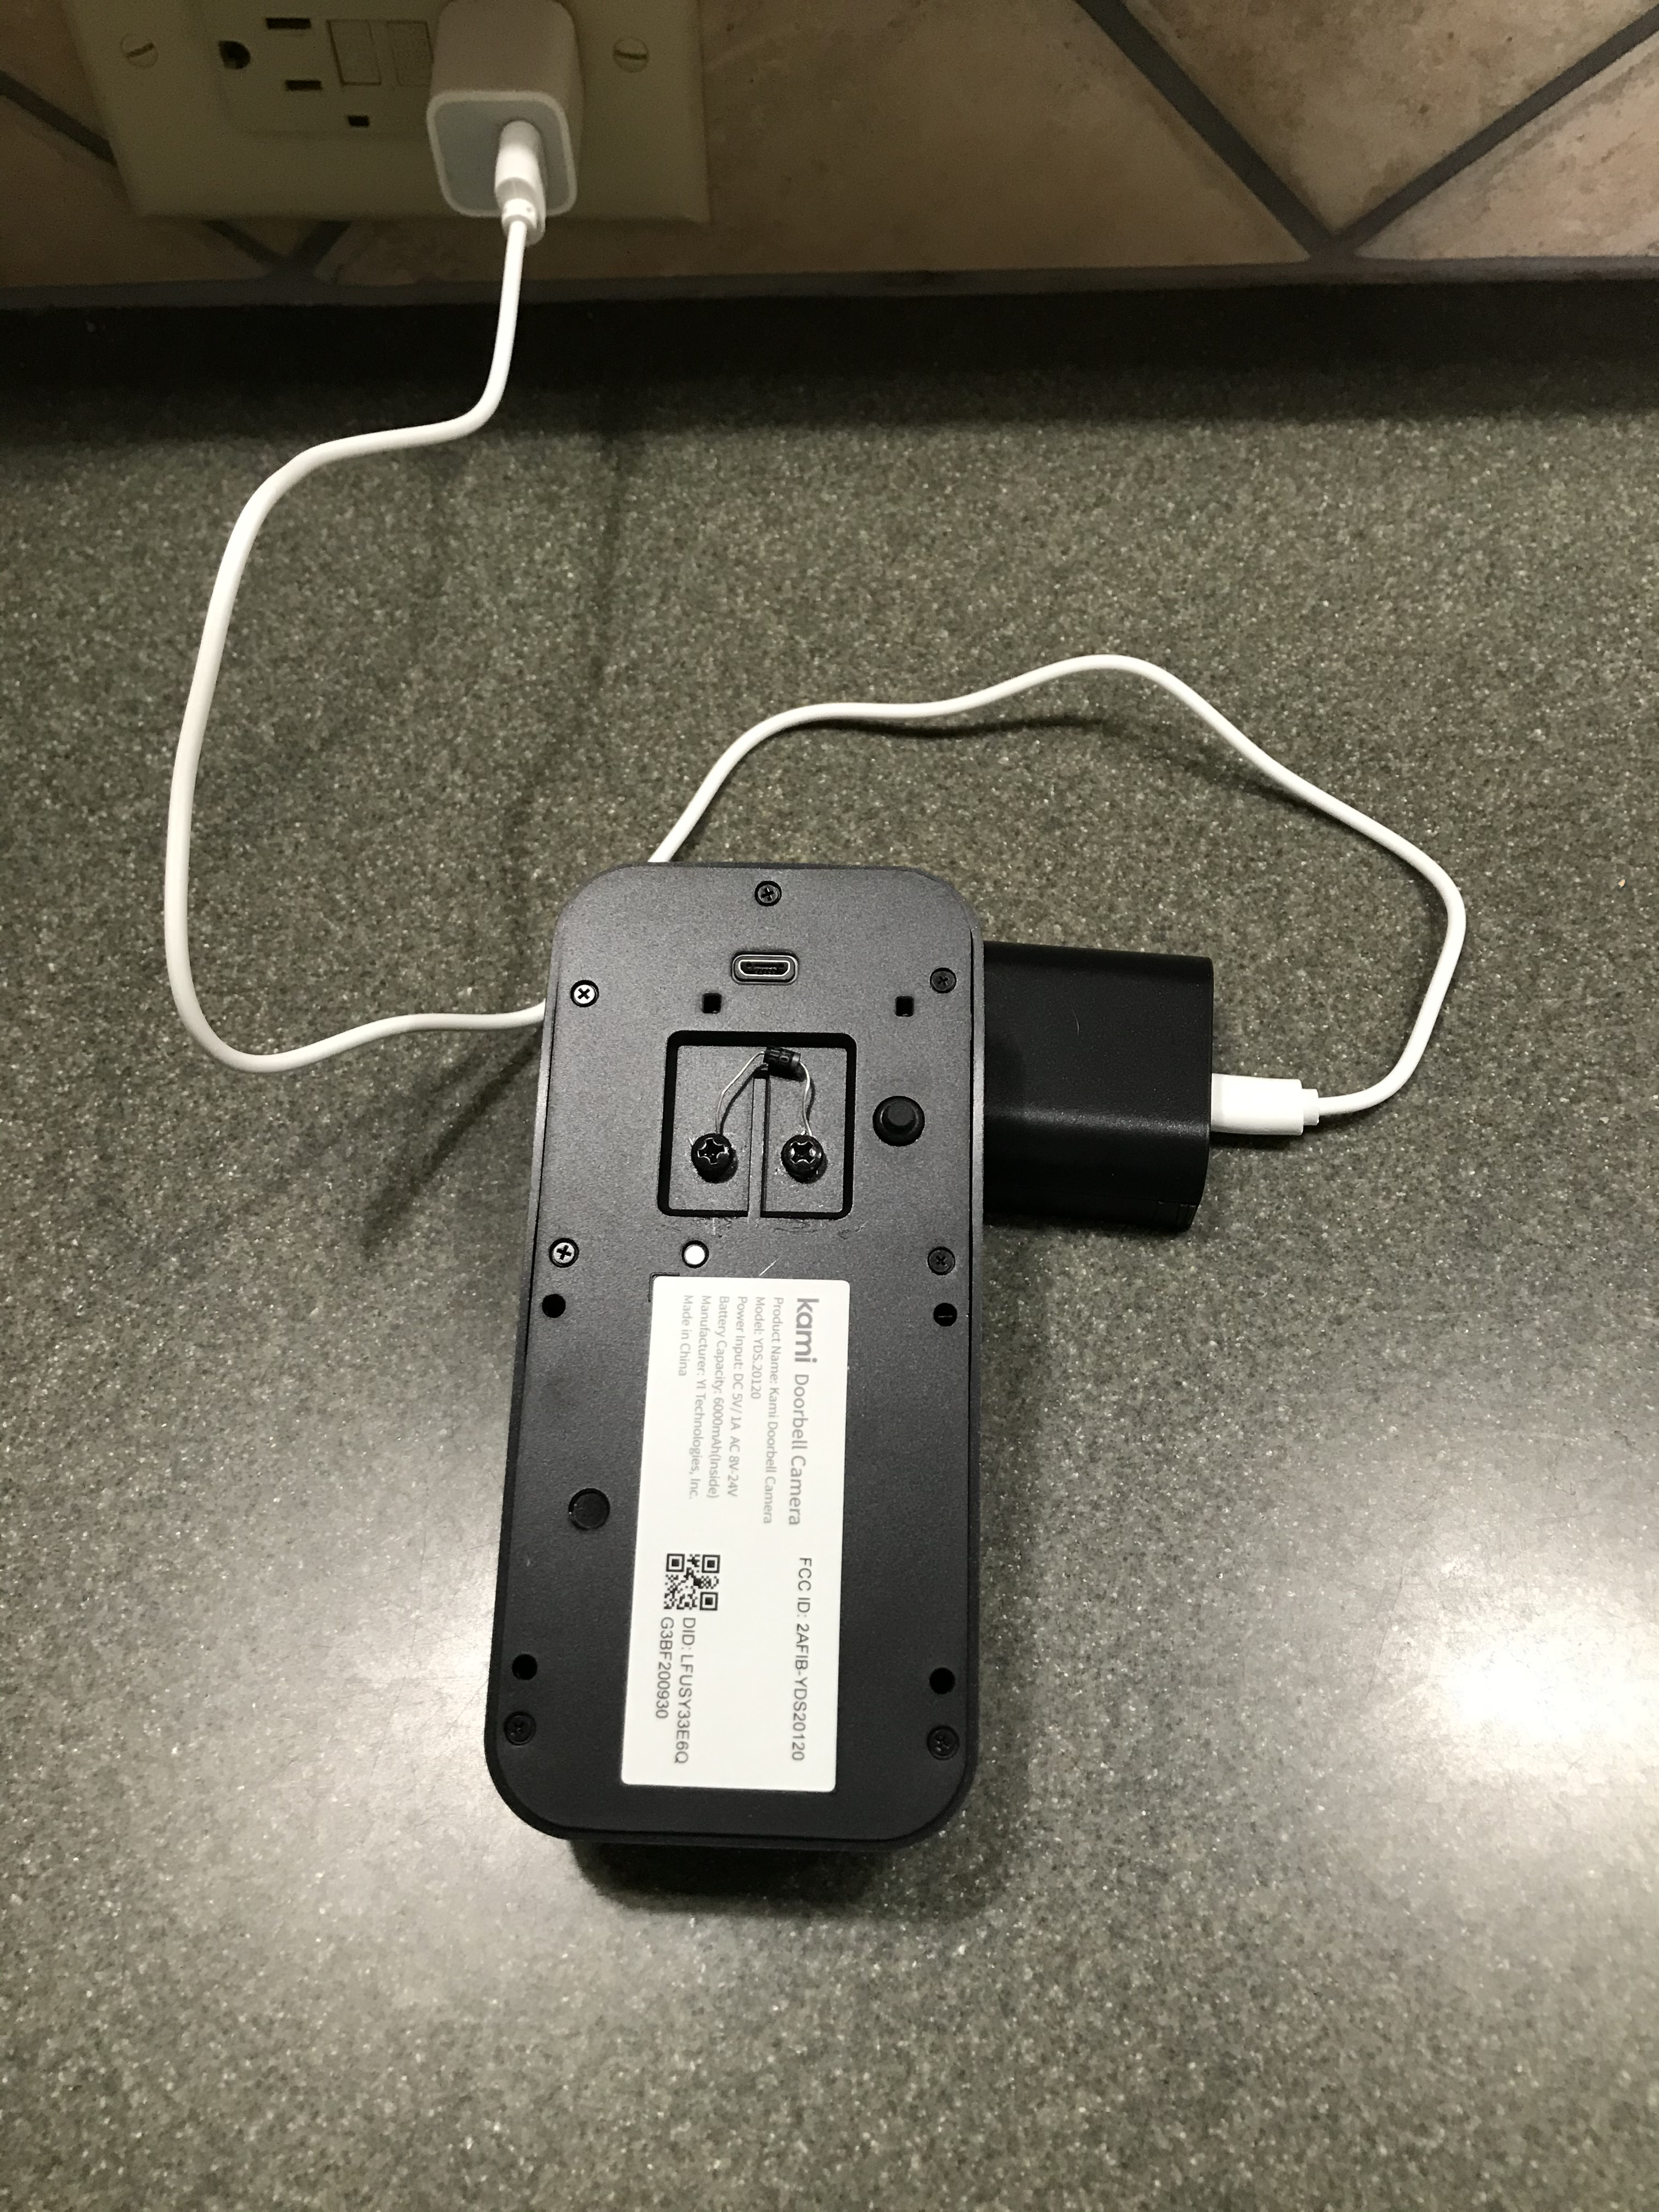
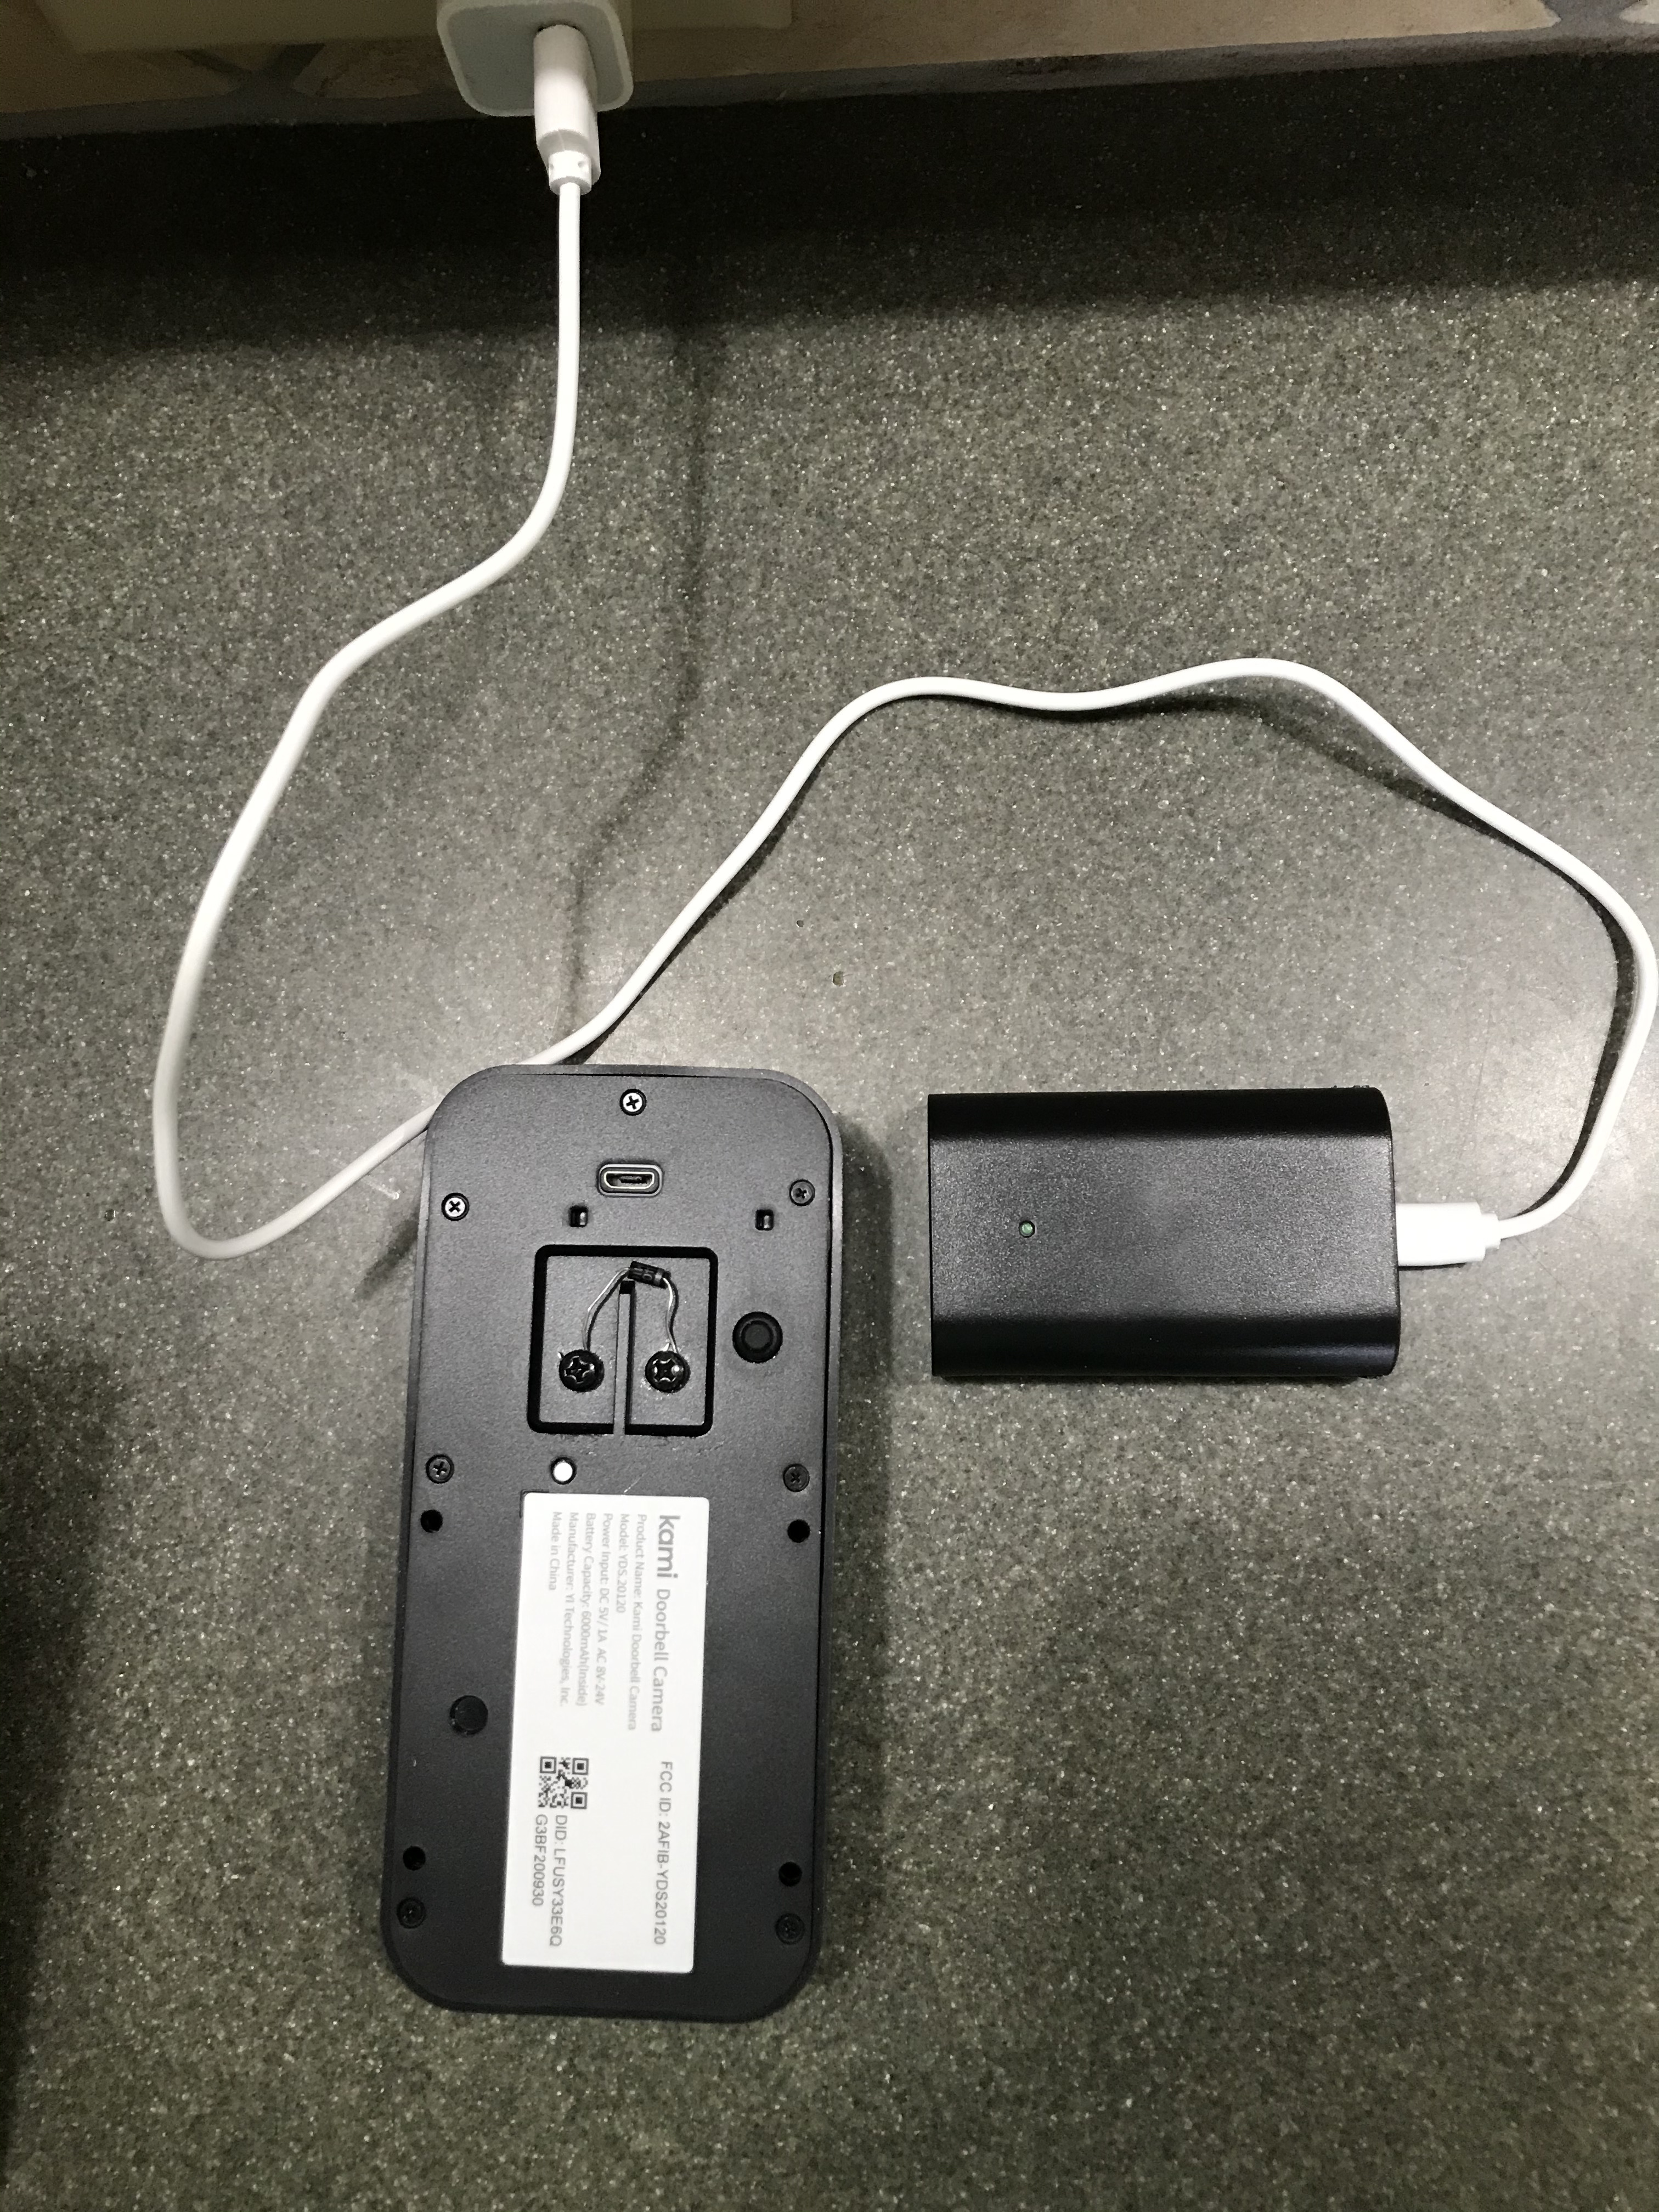
I can’t find the return instructions? Do I need a Return Authorization Number to return this doorbell? I would like to have this doorbell connected using all its features without having to charge the battery by pulling it out every.
you need to charge it for one time over the life of the camera, once you connect the AC source you would never have to charge the battery it will work flawlessly, just keep the battery in the camera and charge it before installing it first time